Flipping the Skull

Flipping the Skull

By Dr. Graham Young, Curator Emeritus of Geology and Paleontology


It is exciting and interesting to work with the fossils of large vertebrate creatures, but this is a field with many complexities. During the fossilization of most vertebrates, the bone was replaced by other minerals, which makes the skeletal components both heavier and more brittle than they were during the animal’s life. For those of us working in the “back rooms” of museums, it can be very tricky to move these large, weighty, and fragile fossils as we prepare them, study them, or mount them for exhibit.

A few weeks ago, we had to perform one of the trickiest tasks associated with big vertebrates: flipping a skull. The large pliosaurid plesiosaur that was donated to the Museum by Wayne Buckley had been fully prepared by Wayne, so that the bones are completely removed from bedrock; their weight is supported by mounts or cradles (structures similar to the plaster field jackets). This makes the fossil much easier to exhibit or study, but it means that we have to ensure that we are fully supporting the skull whenever we move it, so that it doesn’t collapse or break. Since this particular specimen is unique and scientifically important, and since it has survived the past 90 million years or so in remarkably good condition, it is imperative that we take extra care!

A plesiosaur skull fossil in a display mount. A large aquatic dinosaur with a long snout like mouth full of teeth.

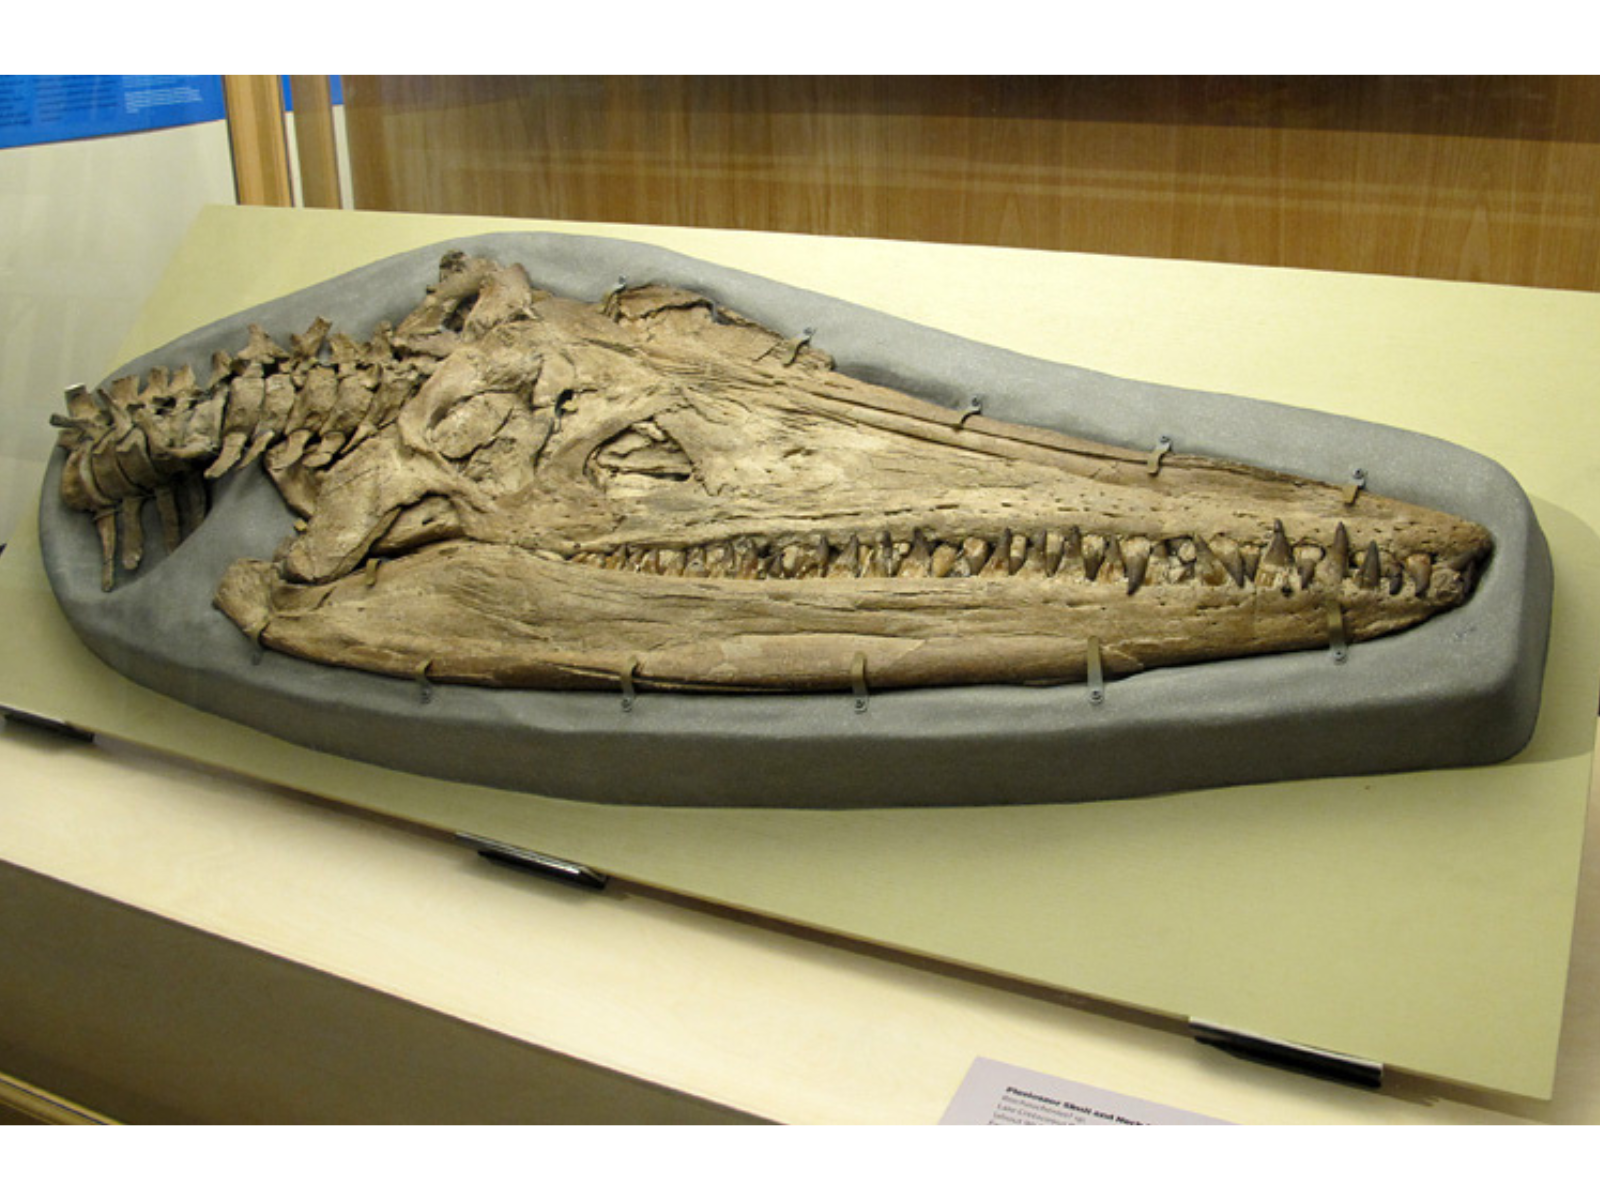
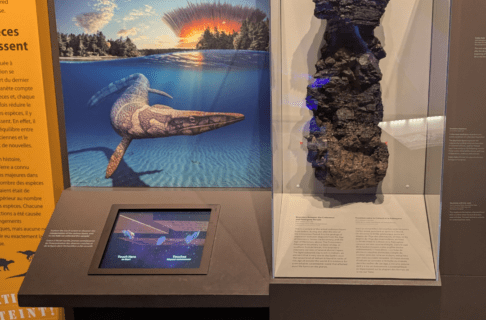
The plesiosaur skull, as it appeared in our temporary exhibit last winter.

Two individuals standing at the far end of a table attaching cradles on either side of the skull fossil.

Janis Klapecki and Tamaki Sato, strapping the two cradles together.

In late September, we were visited by Dr. Tamaki Sato (Tokyo Gakugei University) and Dr. Xiao-Chun Wu (Canadian Museum of Nature), who spent several days here studying the skeleton for a scientific publication. Before they arrived, Debbie Thompson had been making the final exhibit mount for the plesiosaur; to allow her to do that work, the skull was resting in a temporary support cradle, with its “back” side (the side hidden during exhibit) facing up. We knew that Tamaki and Xiao-Chun would want to thoroughly examine both sides of the skull, and that at the midpoint of the week we would need to flip it so that they could study the “front” side.

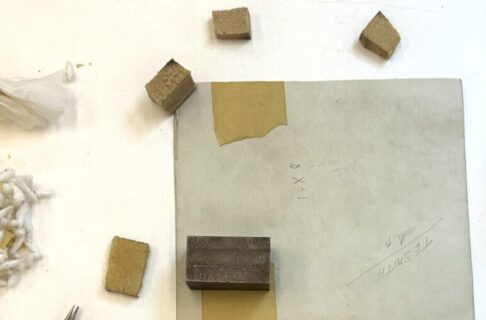
Knowing this in advance, Debbie had prepared a second cradle that would fit onto the the side that was currently up, making this support out of wood, plaster, burlap, and other materials. Unfortunately for us, Debbie was on vacation when the visiting scientists were here, so it was left to the rest of us to ensure that the cradle was used as she had intended.

Five people standing around a table, with a cradled fossil on it. Long boards securaed either side of the fossil hang off each end of the table to facilitate a smooth flip.

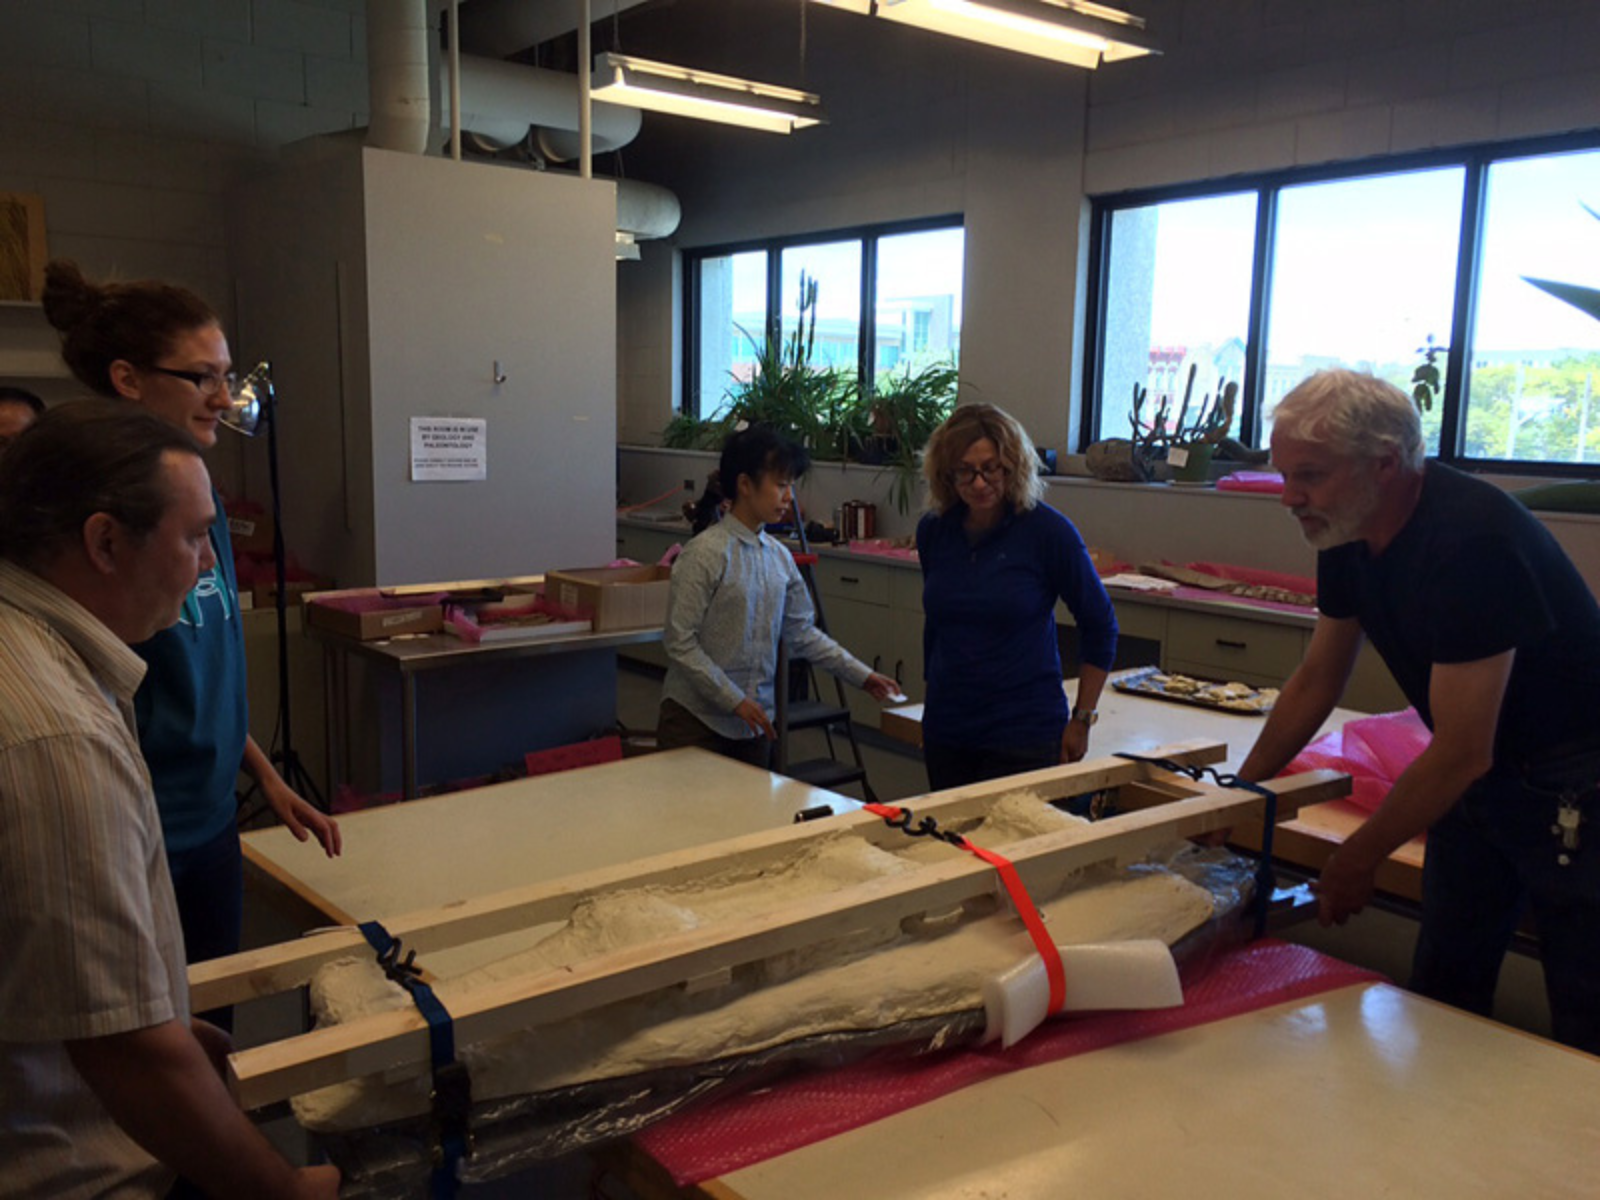
Before we could begin the “flip”, we had to turn the cradles so that they ran across the table. L-R: Kevin Brownlee, Amelia Fay, Tamaki Sato, Janis Klapecki, and me (photo by Stephanie Whitehouse).

View from a raised angle, seven people standing around a table, with a cradled fossil on it. Long boards secured either side of the fossil hang off each end of the table to facilitate a smooth flip.

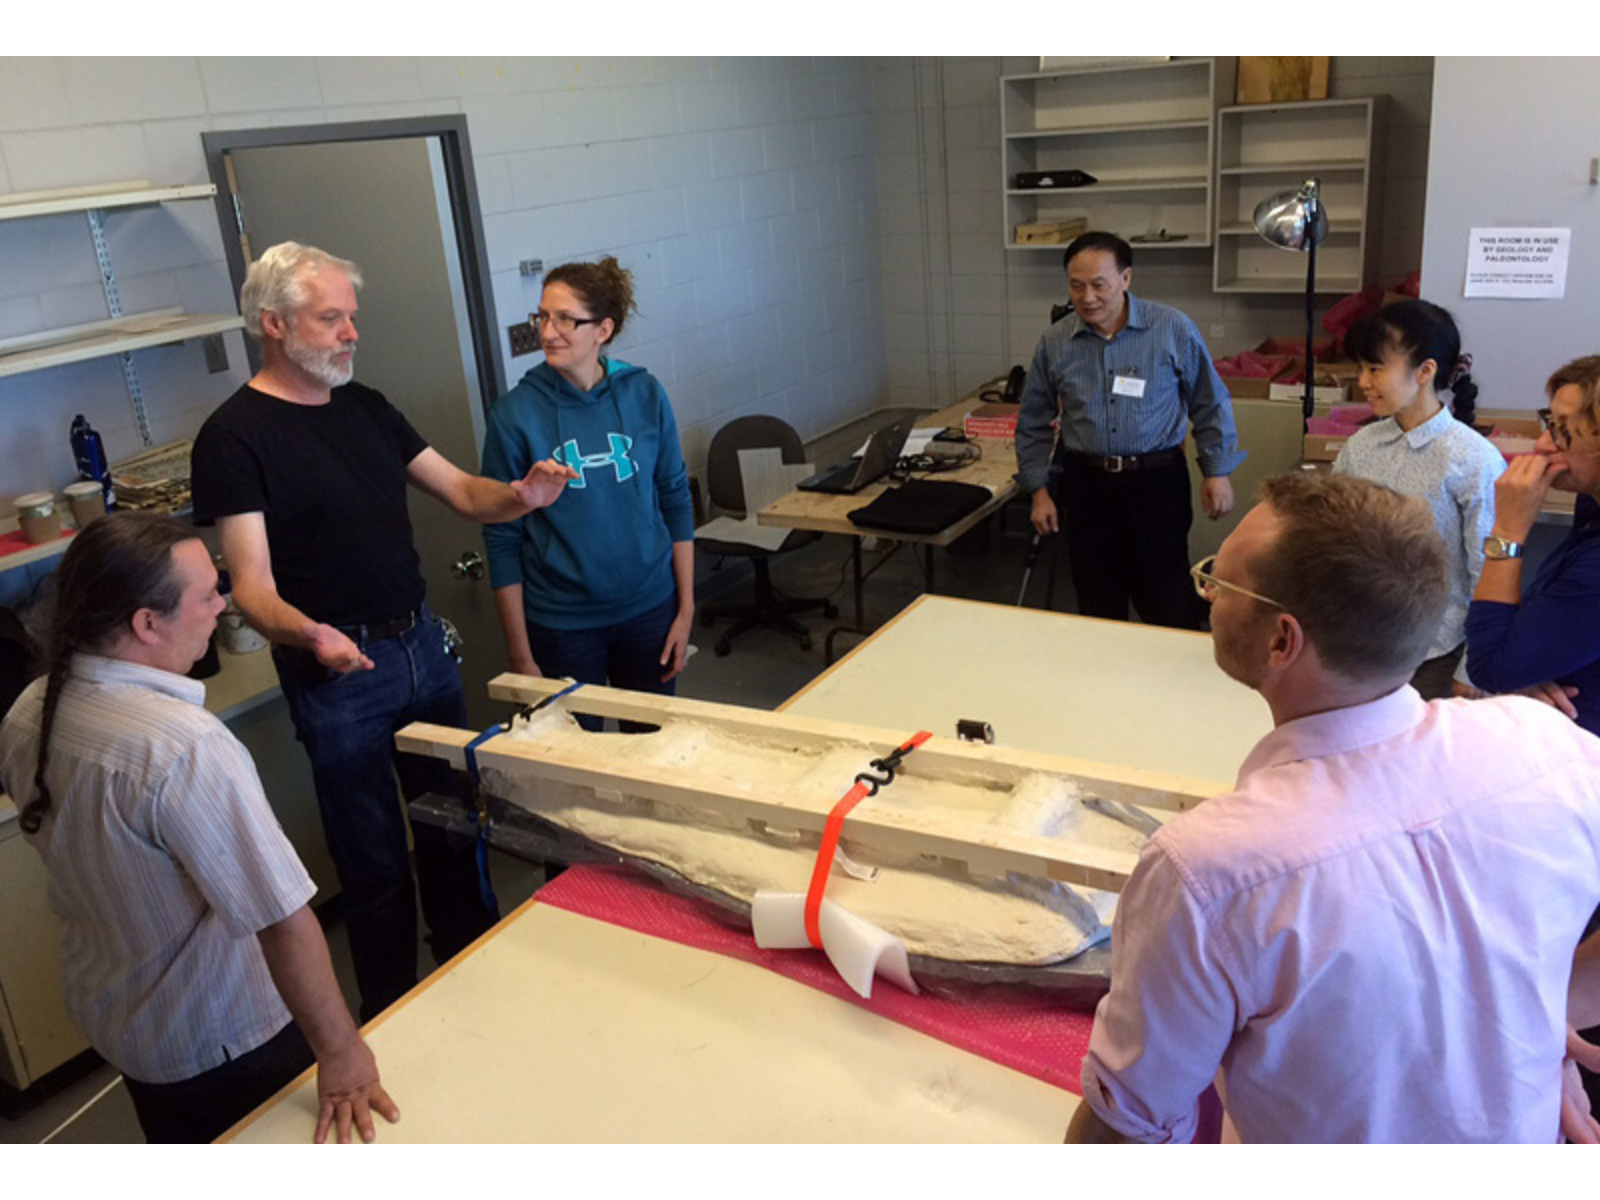
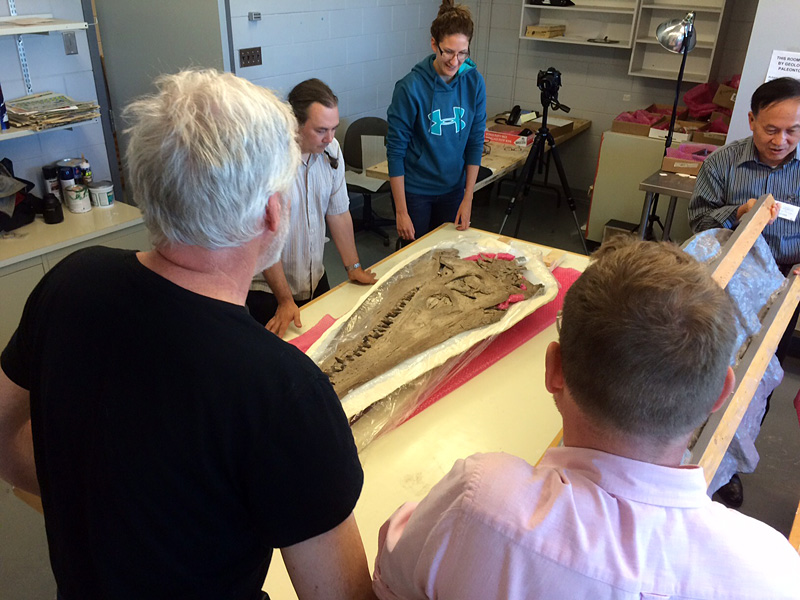
Making sure we are all in agreement before we begin! Clockwise from left: Kevin Brownlee, me, Amelia Fay, Xiao-Chun Wu, Tamaki Sato, Janis Klapecki, and Roland Sawatzky (photo by Stephanie Whitehouse).

On the Wednesday afternoon, Collections Specialist Janis Klapecki and I went to the room where the plesiosaur is laid out, and with Tamaki and Xiao-Chun we fitted Debbie’s second cradle over the skull. The fit was perfect, so we wrapped sturdy packing straps around the two cradles, then tightened them until there was no give and the wood supports were flexing a bit. This tightness would ensure that the bones would move as little as possible during the flip.

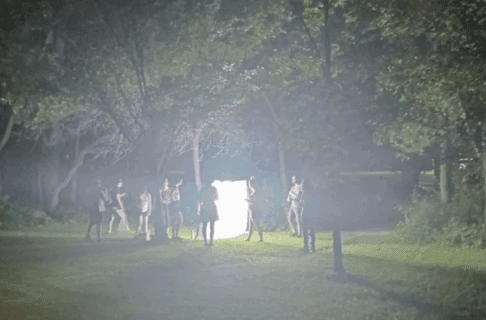
When we were ready, we were joined by several of our curatorial colleagues, who had kindly volunteered their assistance. The skull and cradles were not immensely heavy, but the operation had to be done very steadily and smoothly, so it was best to have two or three people on each end of it. Once we had everything in place, and once we had discussed how we would do it, it only took a couple of moments to actually flip the skull.

Six people, three at either end, in the process of flipping the cradled plesiosaur skull.

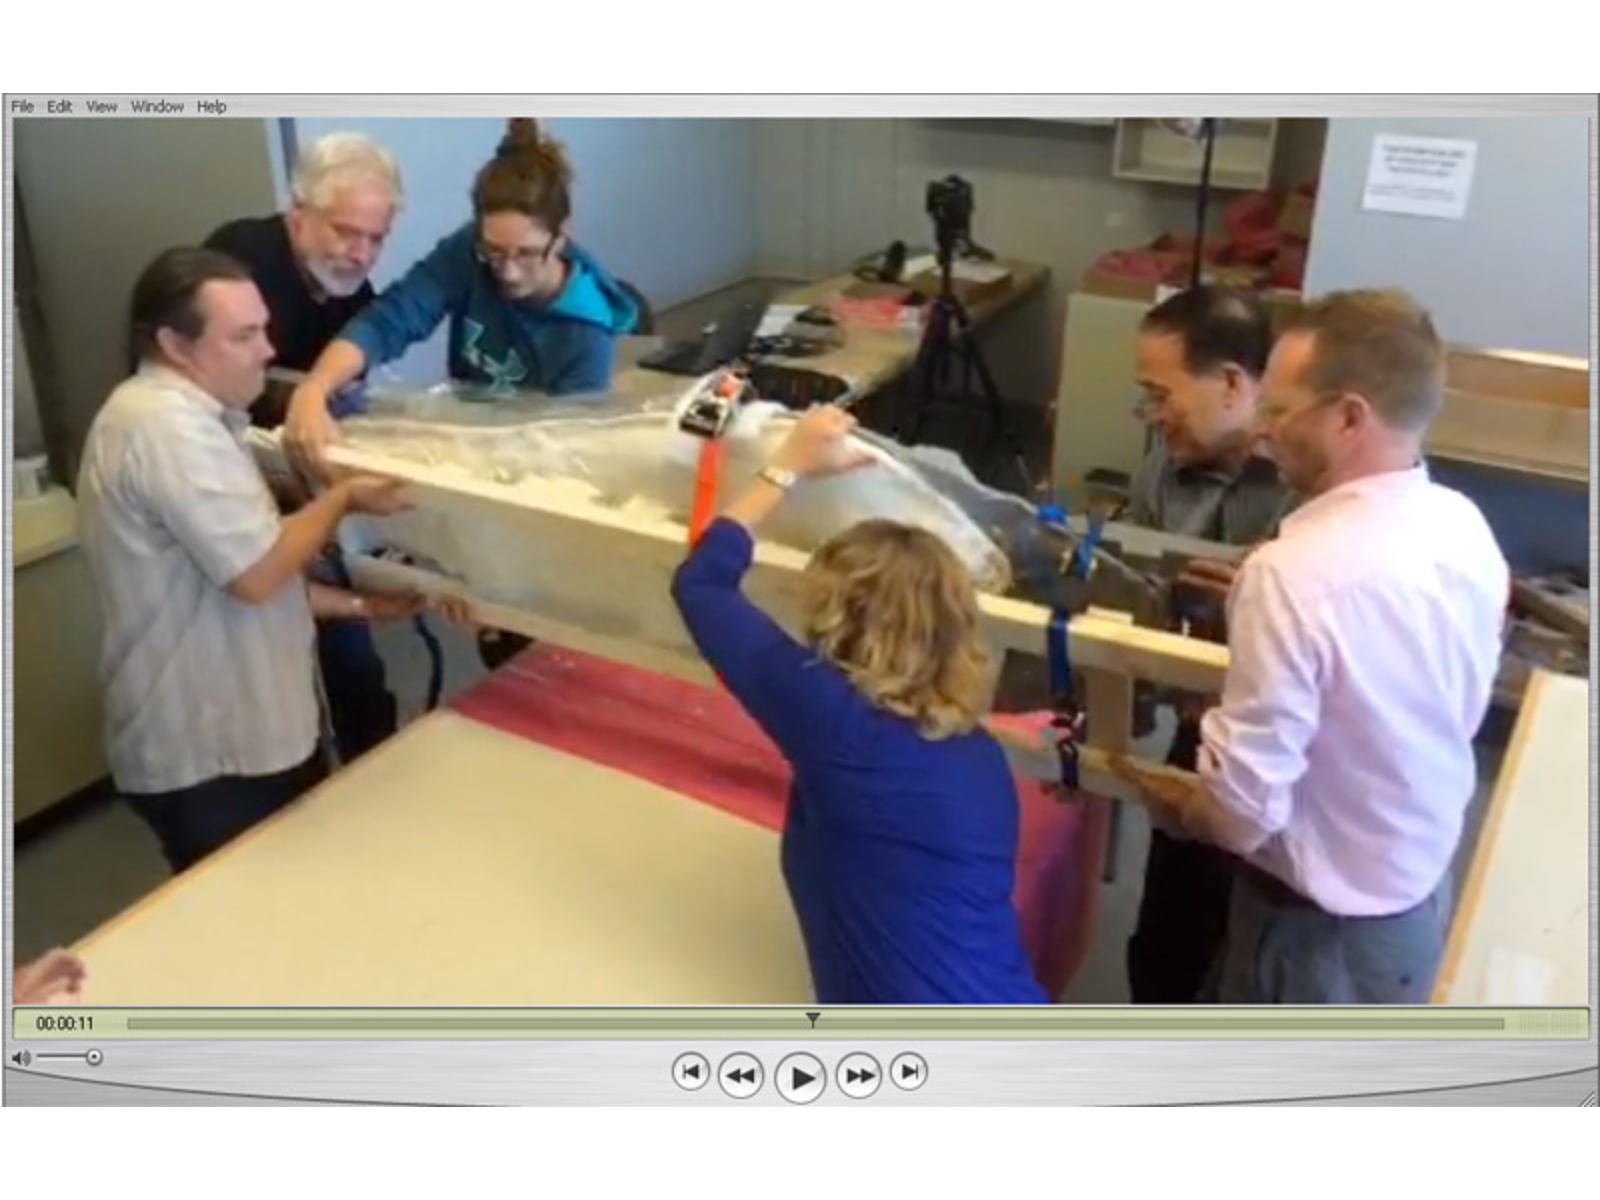
Click the image to watch a short video of the flip (2 MB; video by Stephanie Whitehouse).

Six people, three at either end, bent over to check the condition of the cradled plesiosaur skull post-flip.

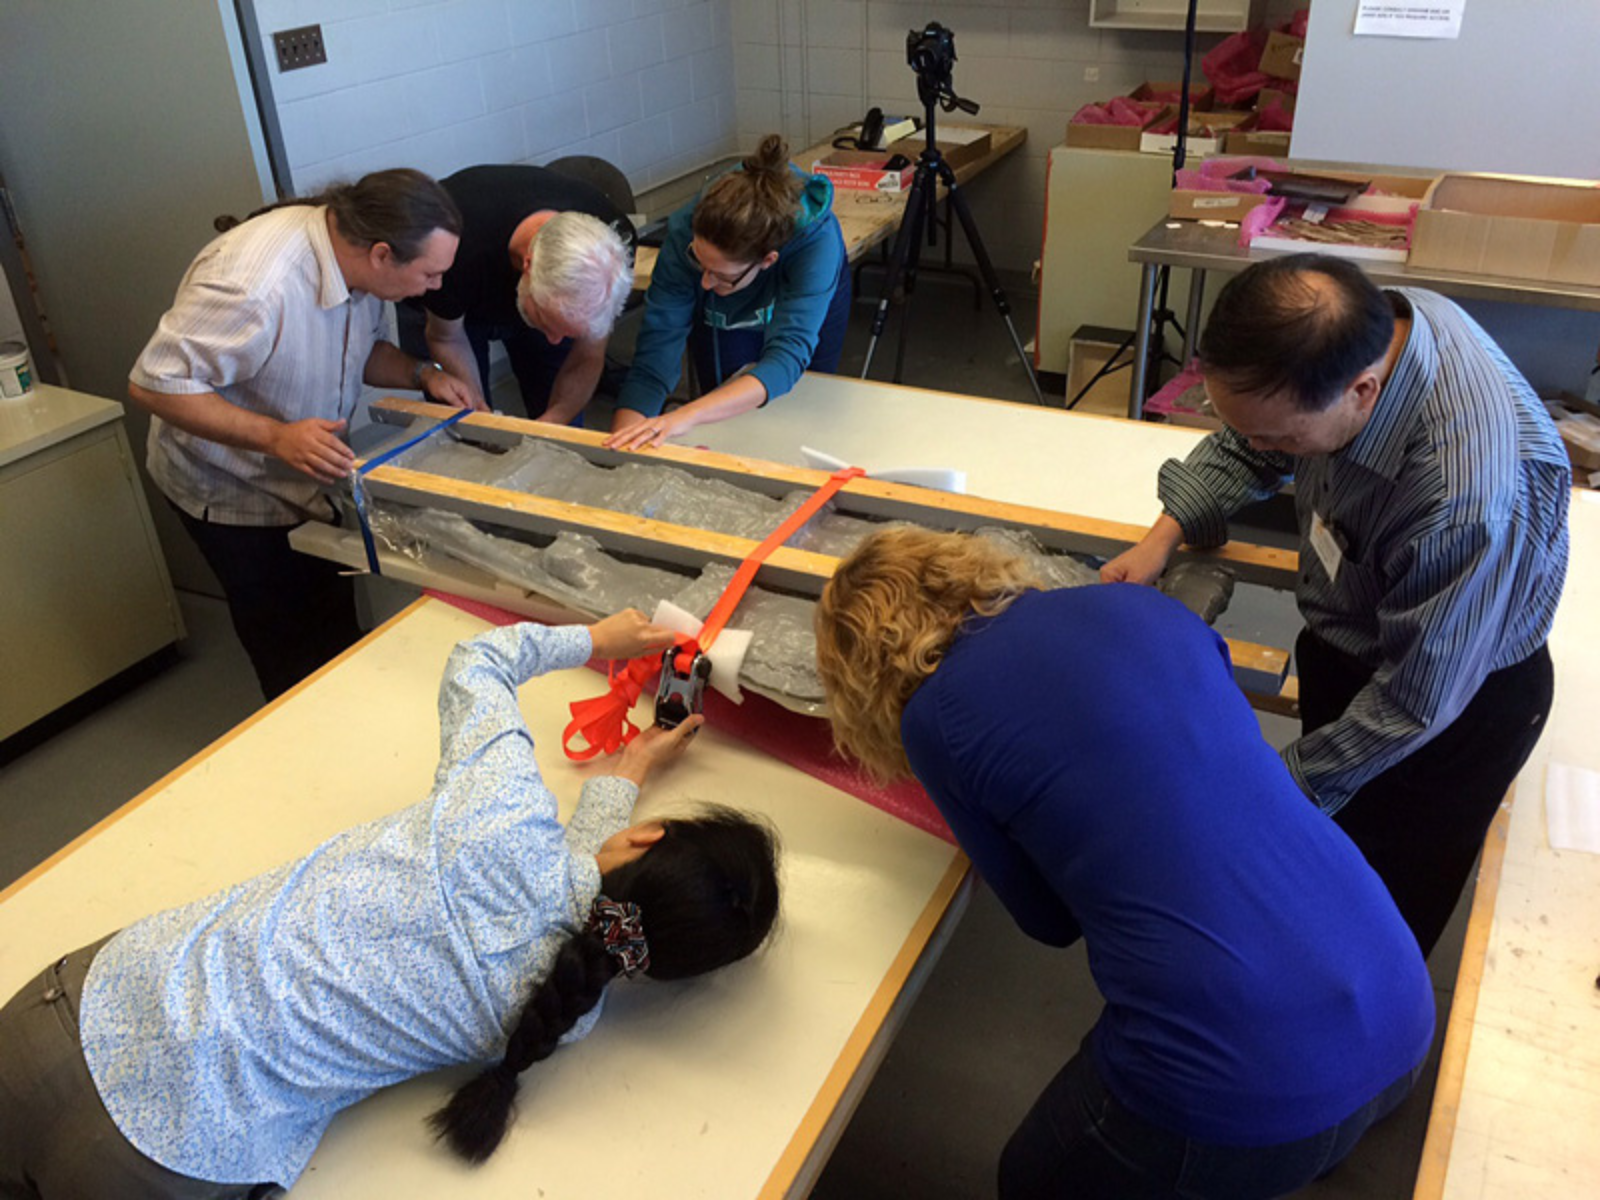
Before we could remove the “lid”, we had to check that the skull was not sticking to it anywhere (photo by Stephanie Whitehouse).

The flipped plesiosaur skull on the table with the cradle and "lid" removed, as five people stand around the table looking at it.

When we removed the straps and exposed the skull, it was clear that the planning had paid off: the fragile fossil had survived it perfectly. Tamaki and Xiao-Chun could continue their scientific study, and the rest of us could return to our many other tasks. But we aren’t quite done with this sort of work yet: we will have to flip the skull at least a couple more times before it goes into a new permanent gallery exhibit next year.


Image: The upper jacket is removed (photo by Stephanie Whitehouse).

A group of eight people pose, smiling together, for a photo at the end of a table which has the flipped plesiosaur skull laid across it.

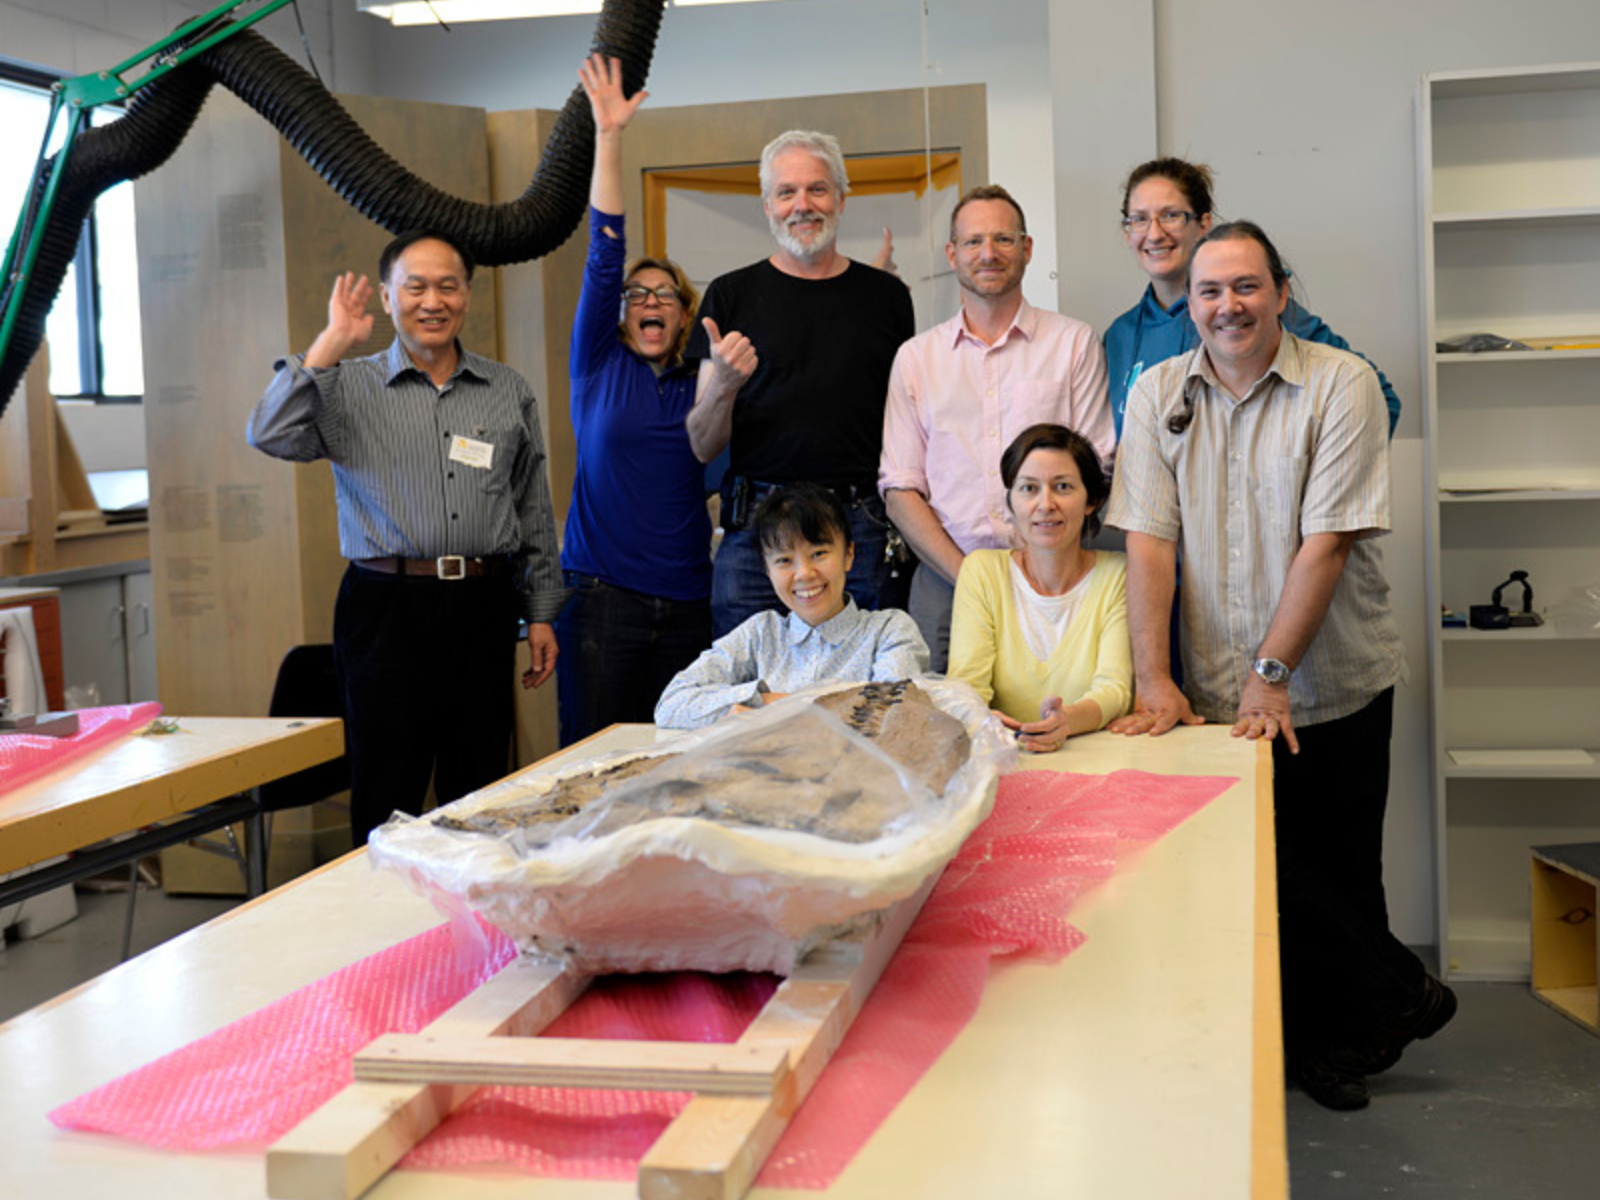
Success! L-R, front: Tamaki Sato, Stephanie Whitehouse; back: Xiao-Chun Wu, Janis Klapecki, me, Roland Sawatzky, Amelia Fay, Kevin Brownlee (photo by Xiao-Chun Wu).


A smiling researcher with a clipboard bends over the plesiosaur skull laid out on the table, illuminated by two spot lights. In the background a second research sits at a desk working on a laptop.

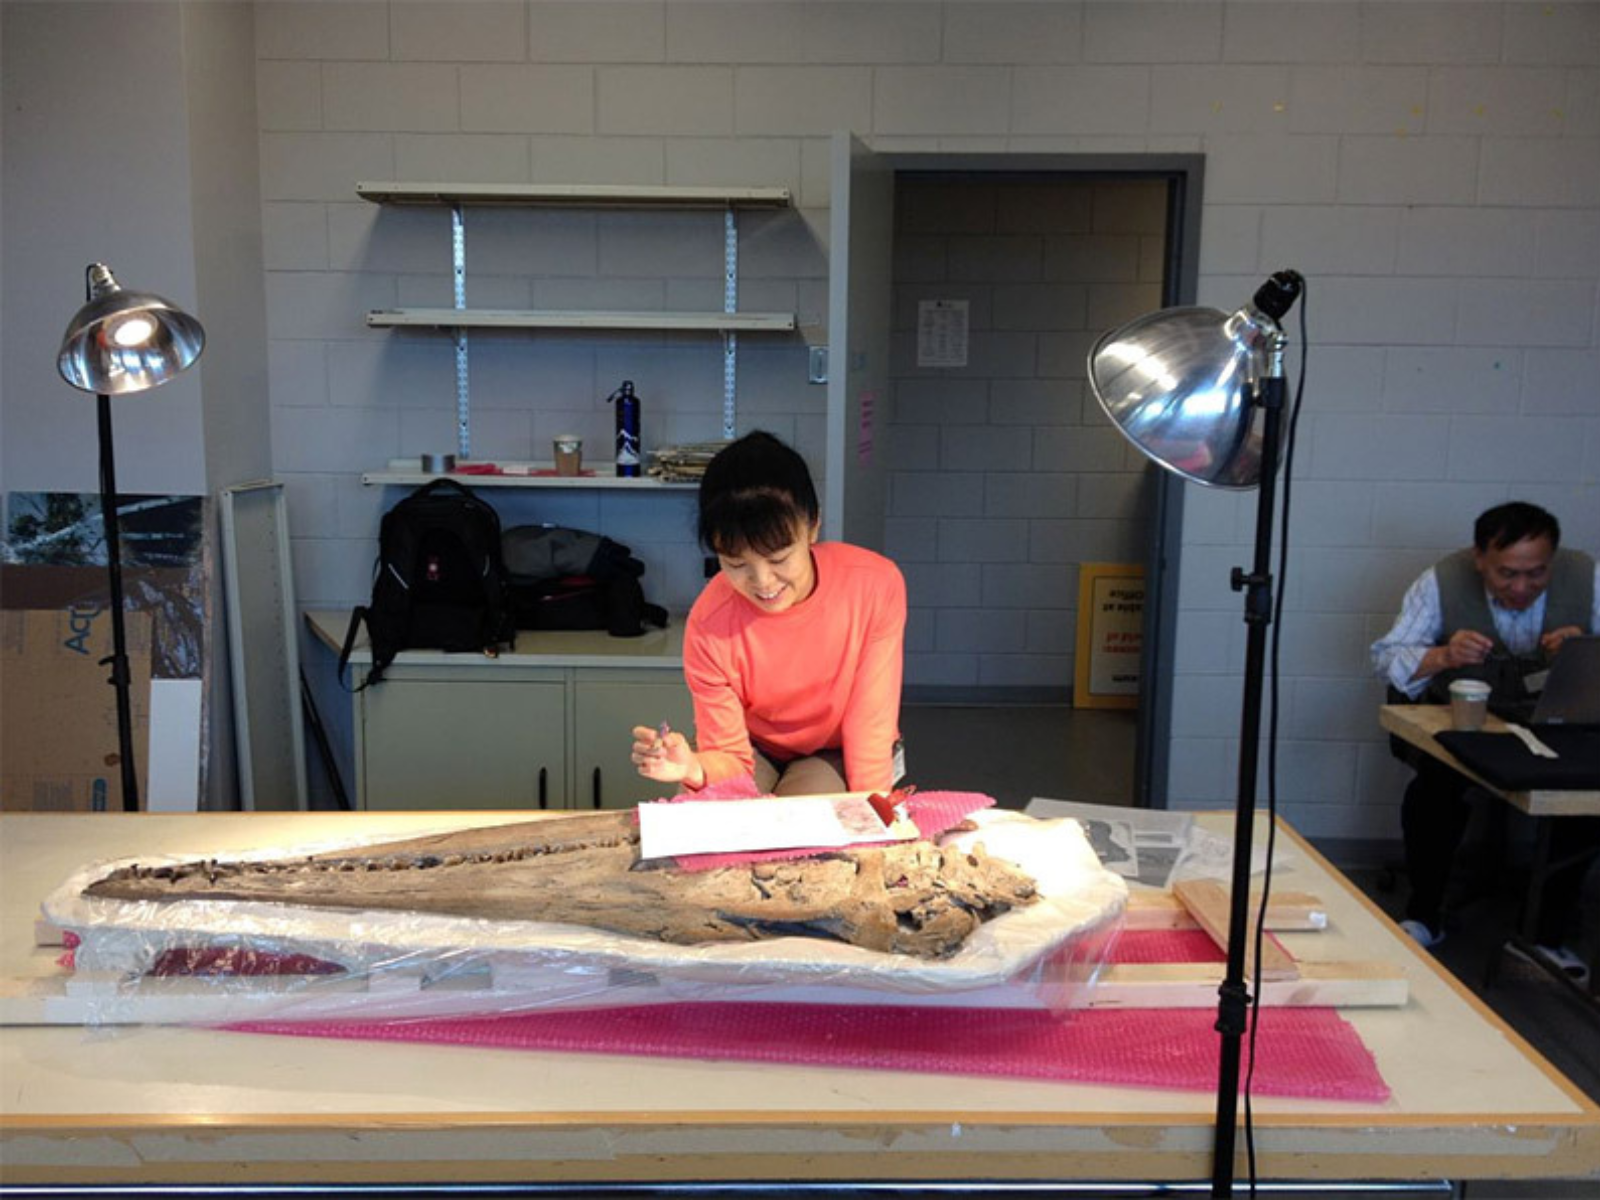
Tamaki and Xiao-Chun return to their scientific studies.

The Smell of History

It’s fairly obvious based on my current job and previous work experience that I love all things old. I love the smell of old books, antique furniture, and apparently historic sites.

One of the goals for my recent trip to York Factory National Historic Site was to capture the site for our visitors with a videography team, but in the planning it seems I forgot about the other senses.

A lot of people have asked me about my trip and whether or not York Factory lived up to my expectations. I am happy to report that it exceeded my expectations, and in ways that I hadn’t really considered. Yes, the site is visually impressive and completely captivating but what really struck me was the smell of York Factory.

An empty room, lit only by the sunlight coming through four windows. Along the walls are empty build-in shelves, and to the left is a wide board laid across two saw horses like a table.

What does York Factory smell like? It smells like history! Each floor of the Depot had a different smell, and none of them bad (somewhat surprising considering that this particular structure has been standing for 177 years!). The main floor had an earthy smell, not musty but the cooler air at ground level made it feel like you were still outside.

The second floor was my favourite, the wood walls seemed to glow in the sunlight and it smelled warm and cozy. The rooms on the second floor were used for storing trade goods and it’s almost as if you can smell the goods themselves. Little maps show visitors what the rooms used to contain, and my absolute favourite room apparently used to store salt, sugar, and liquor (three things I enjoy!).

Image: The saleshop (converted from storage in the 1930s).

Close up view of a number of artifacts laid out on a table in a long room with wooden walls and a peaked wooden roof. Sunlight streams in at the far end of the room.

Looking out over the tables of artifacts you can see the warm glow of the walls and all the bright light from the windows. I wish you could smell it!

A paper map showing the second floor layout. A square building separated into seven rooms around a centre courtyard.

Parks Canada placed these neat maps on each floor so visitors can see each room’s purpose.

Looking directly up at a centre peak of a wooden ceiling, the wood planks have slight variations in colour from dark greys to light browns and reds.

Lying on the second floor and looking up at this beautiful ceiling.

The third floor felt a bit like a cabin, but it lacked the same warm and cozy smell of the second floor. From the third floor you can head up through a small attic area and step into the cupola (a look-out on top of the depot), which might be the only part of the whole Depot that had a slightly musty scent.

So how does one describe the smell of history? It smells like years of human interaction and activity I guess. The Depot at York Factory had people moving goods in and out, and even though I am certain it was hard work and not all happy-fun times like my visit, the place just feels good. From all senses.


Image: The third floor still has that lovely glow, but it didn’t smell as wonderful as the second floor!

Dr. Amelia Fay

Dr. Amelia Fay

Curator of Anthropology & the HBC Museum Collection

Amelia Fay is Curator of Anthropology and the HBC Museum Collection at the Manitoba Museum. She received her BA in Anthropology from the University of Manitoba (2004), an MA in Archaeology…
Meet Dr. Amelia Fay

Adventures of a Summer Student

As a child, the Manitoba Museum was my favourite field trip destination. I loved it all, but my favourite part was the Urban Gallery- particularly Madame Taro’s small apartment, which I thought was quite glamorous. Visits to the museum— either with classmates or family— activated my interest in history and museum work, and this summer I was given the opportunity to join the team through the Young Canada Works program as Collections and Conservation Assistant.

Summer student Jenna smiles towards the camera from her seat at a desk and computer.

One of the first projects I took on was identifying locations for human history artifacts whose locations are “unknown” in the database – 527 artefacts, to be exact. It could be summed up as a glorified treasure hunt. I spent a good few weeks going through the human history storage room— climbing up ladders, rifling through drawers, looking for catalogue numbers on hundreds of artifacts— and finally whittled the number down to 188! This was certainly one of my favourite projects of the summer. It was really fascinating to explore the variety of objects in the collection – everything from night caps to an Oh Henry bar package.

Throughout the summer I performed various forms of preventive conservation. At the end of each month I went through the galleries, labs, and storage vaults throughout the museum to take temperature and humidity measurements, as well as check the bug traps (yikes!). In August, a few of us went down into the hold of the Nonsuch to take taper gauge and trammel rod measurements to determine if the wood of the ship had expanded or contracted in the last six months. Even being on the ship for a couple hours felt a bit claustrophobic – I can’t imagine sailing for months at a time! In addition to these larger projects, I made boxes, altered mannequin forms, and recovered the bales in the Nonsuch gallery. The skills I had learned in 8th grade Home Economics finally paid off.

Elongated triangular flag. The background is yellow wiith a thick black stripe stitched on top reading “Votes for Women” along the centre.

Perhaps one of the coolest things I did this summer was make a replica of a felt pennant for the upcoming “Nice Women Don’t Want the Vote” exhibit (which potentially thousands of people will see – no pressure!). Because the original artifact is quite worn and faded, a replica is more suitable to send along with the travelling exhibit to prevent further damage. Although I was a bit concerned about my lack of sewing and crafting skills, I am incredibly happy with and proud of the final product. The theme of the exhibit—women’s suffrage in the early 20th century—has been an interest of mine for quite a few years, and to be involved in the exhibit in any way was really incredible.

I had a great time at the museum this summer and was able to work on projects in many different areas of collections and conservation. The skills I built on and developed will no doubt open more opportunities for me in my (hopefully) museum-based future. The entire experience—the work and the people—was incredible, and I hope to be back here in the future!

Craziest Botanical Explorers in History

As the opening of the National Geographic Presents: Earth Explorers exhibit at the Museum draws near, I find myself remembering some of the botanical explorers I learned about when I was a student. Although these botanists lived at different points in time they shared one thing: an insane passion for plants that very nearly caused their demise!

Sir Joseph Banks, 1743-1820

A line engraving of a man in profile, with his long hair tied back with a ribbon. Engraved text under the photo reads, "Mr. Bankes".

After whetting his appetite for botanizing in Newfoundland and Labrador, Banks manipulated his way onto the Endeavour, a ship captained by none other than James Cook. During this voyage Banks collected plants from South America, Australia, and New Zealand, contracted malaria, nearly died from exposure and lost four companions. While planning a second journey to search for Antarctica, Banks insisted on bringing 15 companions with him including two horn players (cause everyone knows you just can’t botanize without horn players following you around). To accommodate them, he had a second deck built on the ship Resolution, which made it too top heavy to be seaworthy. Captain Cook was not amused and had it torn down. When Banks saw that his new deck was gone, he had an “epic” tantrum worthy of a spoiled two year old and refused to sail, going on a trip to Iceland instead!


Image: Image of Sir Joseph Banks. V0000331 Sir Joseph Banks. Line engraving. Credit: Wellcome Library, London. Wellcome Images images@wellcome.ac.uk http://wellcomeimages.org Sir Joseph Banks.

David Douglas, 1799-1834

Four cones from a Douglas-fir on a grey surface.

This irascible Scot was a true botanical nutcase. The son of a stonemason, Mr. Douglas became friends with renowned botanist William Hooker, who sent him on a plant collecting trip to the United States in 1823. Instead of bringing food, Douglas had his horse carry 100 pounds of paper to press plants in instead. This turned out to be a bad idea; he was reduced to eating all the berries, roots, and seeds he had collected on several occasions and was twice “obliged to eat up his horse” so that he wouldn’t starve to death. He nearly died from hypothermia, infections, falling into a gully, being attacked by grizzly bears, and the list goes on. The magnificent and enormous Douglas-fir trees (Pseudotsuga menziesii) of the west coast were named after him. He fell into a pit and was gored to death by the bull that was inside it at the age of 35.


Image: Cones of Douglas-fir (Pseudotsuga menziesii) from the Museum’s collection. a species named after David Douglas. TMM B-C-3.

Benedict Roezl, 1823-1885

A hand-drawn picture of a 'Miltoniopsis roezlii' orchid - white petals with a red and yellow interior, and long green leaves.

This hearty Czech botanist was obsessed with collecting orchids, discovering 8oo new species from the Americas. He was so obsessed with orchids that he once climbed a 5,000-m high mountain in Peru looking for new species, despite the fact that he had only one arm (the other was a prosthetic with an iron hook on the tip). To thwart competing orchid hunters, Roezl would either collect or destroy the rarest species he found, to the chagrin of conservationists everywhere. He was robbed by bandits 17 times but fortunately never lost much because the only things he carried were plants. Disappointed at the prospect of no money, one group of exasperated thieves was inclined to cut his throat. They spared him because he was clearly crazy (why would a one armed man wander around the countryside collecting weeds?), and believed that it was bad luck to kill a crazy person.


Image: Obsessed orchid hunter Benedict Roezl discovered this orchid, Miltoniopsis roezlii which was subsequently named after him. Image from plate 6085 in Curtis’s Bot. Magazine (Orchidaceae), vol. 100, (1874).

John Macoun, 1831-1920

Three pressed preserved plants on a sheet of specimen paper. At the end of each of the long, thin stems is a small blue-purple flower. In the bottom right corner specimen data is noted.

Offered the chance to explore the wild west of Canada during a railroad route reconnaissance, Mr. Macoun jumped at the chance, despite the fact that he didn’t know how to swim, canoe, snowshoe, drive a dog sleigh, or even ride a horse very well. He left a pregnant wife and four children behind during his first trip from Ottawa to Victoria in 1872. His journeys to collect the west’s flora occasionally met with disaster. He nearly drowned, was almost crushed by two falling trees, and accidentally shot off his thumb. During one journey, too weak from lack of food to row his canoe upstream, he tied a rope around his waist so he could pull it while stumbling along the shore instead. He collapsed from exhaustion close enough to his destination that he was rescued by local First Nations people. Despite these hardships Macoun collected an astounding 100,000 plant specimens in his lifetime.


Image: Macoun’s Gentian (Gentianopsis macounii) was named after the obsessive Irish-Canadian plant collector John Macoun. TMM B-38914.

Richard Evans Schultes, 1915-2001

A black and white photograph of Dr. Richard Evan Schultes with two Indigenous people in the Amazon. He is holding a selection of plants.

Schultes was obsessed with plants in a slightly different way than the others; he studied the medicinal and hallucinogenic ones. He wrote his undergraduate thesis on peyote and his Ph.D. on magic mushrooms. Not one to take someone’s word on the effects of hallucinogenic plants, he tried many himself, one time passing out for three days. He also took up the indigenous habit of chewing coca leaves to stay alert while travelling in the rainforests of South America. Once, he accidentally set fire to his collection while desperately trying to dry his plants in the jungle, nearly burning down his hosts’ house in the process. Schultes almost died from malaria, the nutritional disorder beriberi, and nearly drowned while doing field work. One night five vampire bats sat on his head and drank his blood. A grateful entomologist he once travelled with named a cockroach genus after him (Shultesia). He collected over 24,000 plants including 300 new to science and is considered the father of ethnobotany.


Image: Dr. Richard Evan Schultes in the Amazon. Public domain, via Wikimedia Commons.

Martin Dugard’s book “Farther Than Any Man”, Tyler Whittle’s “The Plant Hunters”, John Macoun’s autobiography “John Macoun: Canadian Explorer and Naturalist” and Wade Davis’ book “One River” were essential references for this blog and make excellent reading for those of you who wish to learn more about these extraordinary men.

Dr. Diana Bizecki Robson

Dr. Diana Bizecki Robson

Curator of Botany

Dr. Bizecki Robson obtained a Master’s Degree in Plant Ecology at the University of Saskatchewan studying rare plants of the mixed grass prairies. After working as an environmental consultant and sessional lecturer…
Meet Dr. Bizecki Robson

Cleaning Week: Filing Trilos

By Dr. Graham Young, Curator Emeritus of Geology and Paleontology


Last week was the Museum’s “cleaning week”, during which we were closed to the public so that we could focus on getting our house in order. There was much recycling of paper, moving of old furniture, and scrubbing of walls in many parts of the Museum. Here in the Geology and Paleontology lab, we decided that this was the ideal time to file some of the fossils that had been catalogued in the past few months. Most particularly, we put away several hundred Ordovician age trilobites from the Stony Mountain Formation at Stony Mountain, just north of Winnipeg.

Three drawer inserts full of catalogued trilobites, ready to be placed into their drawers.

How did the Museum end up with hundreds of trilobites that needed cataloguing? Stony Mountain is one of the really important sites in southern Manitoba dating from the Late Ordovician Period, about 445-450 million years ago. During this time central North America was covered by tropical seas, and at Stony Mountain the limestone deposits are tremendously rich in fossils of marine invertebrates: corals, brachiopods (lamp shells), trilobites, and many other kinds of creatures.


Image: Some of the catalogued trilobites, ready to be filed away.

Close up on a small box with six fossil pieces laid in cut-out foam beds, and a vial with cotton and smaller fossil pieces.

Staff and volunteers from this Museum and its predecessor have collected fossils at Stony Mountain since the 1930s; over the years thousands of specimens have been catalogued to our collections, but very few of these were trilobites. A museum always collects more samples than can be catalogued quickly, and the Stony Mountain trilobites are somewhat complicated and consist mostly of small pieces*, so we had been holding onto them until there was time to consider which ones belonged in the permanent collection.


Image: Components of a trilobite that may belong to the genus Failleana (that’s a cranidium, the mid-part of a head, on the upper left).

We knew that the Stony Mountain trilobites had been gradually “stacking up”, and volunteer extraordinaire Ed Dobrzanski and I had decided that we would devote some serious time and space to this project when we could. A few months ago the lab was looking relatively clear, so we laid out the hundreds of trilobites in trays and decided which ones were good enough to go into the permanent collection. I identified quite a few of them, but it fell to Ed to carry out the laborious, repetitive work of cataloguing each specimen.

Volunteer Ed Dobrzanski standing with one hand on his hip in front of a tray of trilobite specimens.

The invaluable Ed Dobrzanski did most of the work on this project.

View down a storage room aisle, with metal cabinets lining either side.

The specimens were filed away in our collections room.

When he was done, there were some 150 catalogued batches, all neatly laid out and padded. Once I had reviewed his records (we always double-check everything for accuracy!), we still had to find space in the collections, shifting the drawers in several cabinets to free up a block so that the trilobites could all be together and organized.

Finally, last week, we put the trilobites away! This may seem like a very big job for some small old fossils, but it means that many potentially important specimens are now properly recorded and stored, with the trilobites and their data readily available for future research or exhibits.


Image: One of the drawers of Stony Mountain trilobites.

Close up on a fossilized cheirurid trilobite.

An enrolled and incomplete cheirurid trilobite, possibly belonging to Ceraurinus.

Two boxed trilobite specimen components in storage.

Trilobite components: the tail (pygidium) of a cheirurid on the left, and partial mouthparts (hypostome) of an asaphid on the right.

*These trilobites are almost all incomplete because most trilobite fossils are from pieces of exoskeleton left behind when the animals moulted in ancient tropical seas. For the fossils at Stony Mountain, wave and current action on the ancient seafloor caused further abrasion and breakage.

Left Behind in Airport Cove 

By Dr. Graham Young, past Curator of Palaeontology & Geology


If you think about how Museum paleontologists get fossils, you might guess that we go out and find where the fossils are, extract all of them from the rock and sediment, and return them to the Museum. Certainly that is what we do where fossils are scarce, but in many instances our job really consists of deciding what to leave behind. Our specialists at the Manitoba Museum are called curators, and a curator by definition has to be able to select what is needed for collections and exhibits. 

Photo looking out over a rock landscape with low pools of water. A group of indviduals are scattered around looking at the rocks

Our field group, walking across dolostone beds in the Silurian part of the cove.  

This fact was really brought home to me in the past couple of weeks, as we revisited sites in Airport Cove, the stretch of shoreline north of the airport at Churchill. Airport Cove covers a large area, with many patches of bedrock spread across the shoreline. These patches of rock allow us to sample many different sedimentary beds from the end of the Ordovician Period and the beginning of the Silurian Period, roughly 445-435 million years ago. 

Landscape view over a rocky stretch of ground leading to the open water in the distance.

In the cove, the rock seems to go on almost forever. 

The rocks in the cove were deposited as sediment in warm tropical seas, so fossils are plentiful in many of them. With such an embarrassment of riches we have to be selective every time we go out in the cove; if I collected every decent fossil, we would need an entire freight train to get them to Winnipeg!  And then, where could we possibly store them? 

Close-up on rock surface with two shell fossils embedded in it. A size scale card is placed in frame along the bottom.

Two examples of the large Silurian brachiopod (lamp shell) Virgiana decussata.

As a result of our previous work here, many examples of the “standard” fossils from Airport Cove are already resident in the Museum’s collections, and this time we were looking for very specific and rare things. So we would walk around the cove each day, considering and photographing the more common sorts of fossils. Some of these are old friends, on blocks of stone that I can remember being in the same place ten or fifteen years ago. Others were new to me, but I can hope to see them again if I get back here. And then there are the few fossils that are so good that they must go to the Museum; one of these is shown at the end of this piece. 

Close-up photo of a section of rock with many small fossil pieces embedded in it. A size scale card is placed in frame along the top.

Abundant pieces of auloporids, Silurian “organ pipe” corals, in a dolostone bed low in the modern intertidal zone.

If you are ever in the Churchill area and wish to go looking for fossils, please follow all  guidelines on polar bear safety! We had to leave our work area at Airport Cove twice last week as there were bears nearby, and on one occasion a mother and cub walked right through our site very shortly after we got into the truck. 

Photograph of a section of rock with an elongated tube-shaped fossil in the surface. A size scale card is placed on the rock beside the fossil.

Old friends: we have been walking past this block of Ordovician stone for the past fifteen years or more. The elongate fossil on the left is the central tube (siphuncle) of a nautiloid cephalopod, while that on the right is an tall aulacerid stromatoporoid (sponge). 

Close-up photo of a section of rock with a curved U shaped fossil in the surface. A size scale card is placed in frame along the top.

The pygidium (tail) of the Ordovician trilobite Isotelus.

Close-up photo of a section of rock with dark lichens growing on the surface. Two fossils are embedded in the rock, on round and swirled, the other rounded on one side. A size scale card is placed in frame along the left edge.

Another example of the gastropod Maclurina manitobensis (lower), with an unidentified fossil that might be a stromatoporoid sponge.

A section of rock with half of a round, swirled fossil embedded in it. A quarter is placed on the rock’s surface for scale.

The one we couldn’t leave behind: this beautiful Ordovician coiled nautiloid cephalopod is now in transit to Winnipeg, along with the other fossils we collected. 

Landscape photograph looking out over a rocky shoreline at the water’s edge.

The end of the cove.

Northern Exposure – Part 4 (Cataloguing)

Guest blog by Jacinda Sinclair, contract Cataloguer and long-time TMM volunteer.


In Northern Exposure Parts 1-3, Amelia wrote about her experiences excavating. Now I’m going to cover what happened to her artifacts once she got them back to the Museum.

Cataloguing is a 7 step process.

Step 1 is sorting. To start, I order the artifacts by matching them to the field records made by Amelia’s team. Artifacts found in the same excavation unit are always grouped together.

Step 2 is cleaning. A bucket of plain water and an old toothbrush is usually the way to go.

A spread pile of record sheets with the Government of Manitoba logo on them next to some paper bags, labelled with basic identification details.

Step 1, Sorting: Matching field-bagged artifacts to their record sheets. Sometimes figuring out what goes where can be tricky.

A blue rubber basin with a shallow amount of water covering the bottom, and a toothbrush laid along the upper side.

Step 2, Cleaning: I wouldn’t want to brush my teeth like this, but it’s just fine for artifacts.

A sheet of paper containing columns of catalogue numbers, with a cutting tool, tweezers, small paintbrush, and a jar of sealant placed on top.

Step 3 is identification. This is the hard one. I need to figure out what each artifact is as well as any other information I can gather about how and when they were made. So how do I figure this out? I use a combination of resources: reference books, websites, and the Museum’s own comparative reference collection. This information is entered into a computer database. I also add excavation information from the field notes. The computer assigns each artifact its catalogue number and prints catalogue cards.

Step 4 is labeling. I use a special sealant to glue acid-free labels onto artifacts.


Image: Step 4, Labeling: Labeling tools. Until recently, labels were written onto artifacts using fountain pens. It was harder to do and even harder to read.

Step 5 is photography. Photos create an extra record for the assemblage making it easier for archaeologists to do research. Typically not all artifacts are photographed, but if done correctly, anyone looking at the pictures will have a good idea of what the site was like.

Step 6 is conservation. Damaged (rusty) artifacts need special treatment to protect them from further damage. While I might identify which artifacts need conservation, the Museum has a specialist who does the work during this step. The coolest thing about conservation is that sometimes details like maker’s marks are only visible after rust is removed.

Step 7 is storage. Each artifact gets put in a plastic bag with its catalogue card. Everything is filed and placed in climate-controlled storage.

A circular artifact propped up with supports on a surface covered in a grey fabric. A camera is positioned directly above, looking down at the artifact.

Step 5, Photography: Photographs need to be taken from many angles. Getting things into position can be tricky.

Two photos side by side. On the left is a photo of a rusted fish hook. On the right is a close up at one end of the hook where a possible maker mark is mostly concealed by rust.

Step 6, Conservation: Is there the outline of a maker mark on this fishhook? We won’t know for sure until after conservation.

A thin white artifact in a plastic sleeve with an catalogue card identifying is as part of the stem of a pipe. The plastic sleeve is placed on the top of a box filled with similar sleeves.

Step 7, Storage: The end product ready for storage.

That’s cataloguing! Some of the steps sound kind of fussy and boring, but I’m someone who likes to be moving and doing something (even when I’m watching TV), so actually the whole process is pretty relaxing. I love how sites from the same time period and/or area can turn out to be really different from each other. Finding out how each site is unique is the best part of cataloguing.

Broken pieces of pipe stems are common at fur trade sites and don’t usually get as much attention as bowls and spurs, but it’s really impressive to see a complete stem laid out.

Journey to York Factory

My last stint of fieldwork this summer had me checking off a box on my bucket list, I finally made it to York Factory! Why did I want to go there so badly? Well, not only is it one of the most important Hudson’s Bay Company sites, it was also the entry-point for early immigration to our province and beyond, I knew I had to see if for myself.

In partnership with Parks Canada, York Factory’s current custodians as it is now a National Historic Site, Kevin Brownlee and I set out with a fantastic videography duo (Kevin and Chris Nikkel) from Five Door Films to try and capture the essence of the site and bring it back for our Museum visitors.

York Factory is located near the mouth of the Hayes River, it’s not the most convenient location for most Manitobans or tourists to visit. That said, the site and surrounding environment is INCREDIBLE so if you ever have the chance to travel up that way, jump on it!

A map of Manitoban with a rectangle placed over a portion in the north east near Hudson Bay.

Map of Manitoba showing area of our journey (Map adapted from Google Earth).

A close up on the portion of the map marked off in the previous photo, showing the Nelson and Hayes rivers.

A close up of the Nelson and Hayes rivers (Map adapted from Google Earth).

Our journey to the site was just as amazing as the site itself, we opted to travel by boat so we arranged our trip with Clint from Nelson River Adventures. Clint was incredibly helpful with the planning and logistics, and he even arranged our transportation from the Gillam airport to his boat launch.

The Nelson River was very scenic, we went through some rapids, saw eagles flying overhead, and made a quick stop on Gillam Island to inspect a plaque in honour of Thomas Button (the first European to set foot in Manitoba in 1612, and the one to give the Nelson River its name).

Three individuals standing to the side of a dirt road, on which a large truck is pulling a trailer with a motor boat on it.

Nelson River Adventures has a pretty sweet set-up to take folks out to York Factory.

A rocky, treed bank increasing in incline, along a cloudy river.

The Nelson River is stunning.

A plaque with a short biography of Sir Thomas Button written in English, French and Inuktitut.

Plaque on Gillam Island in honour of Thomas Button.

As we came to the mouth of the Nelson a bank of fog rolled in, making old Port Nelson look extra creepy. In 1912 the Canadian Government had selected this site over Churchill for their port on Hudson Bay and planned to link it with the Hudson Bay Railway. There were many reasons why this attempt was unsuccessful (too many for this post!) resulting in the abandonment of the site in 1918. Now all that remains is a wrecked dredging ship, and the truss bridge out to a man-made island.

The fog persisted as we emerged into Hudson Bay, and the sea was angry! It was just as I imagined the Bay to be, I would have been disappointed if it was smooth and calm. The boat has to swing out wide into the bay to avoid the shallows of Marsh Point between the Nelson and Hayes rivers. Clint deftly handled the waves while we enjoyed the bumpy ride.

Part of a wrecked dredging ship emerging from choppy water beneath a grey sky.

Wrecked dredge at Port Nelson.

Two smiling individuals, both wearing baseball caps and sunglasses, posing on the deck of a boat for the photo.

Our Captain Clint with First Mate Grizz.

Eventually we made our way around the point and down into the Hayes. Claude and Kyle (Parks Canada site manager and summer student) were waiting for us at the dock and helped us unload all of our gear. We’d made it, and while the journey itself was exciting, we were in for a lot more during our week-long stay!

View across a stretch of grass and bush towards a large three-storeyed building beneath a blue sky with occasional white clouds.

After climbing up the steep steps from the dock this is the view I was greeted with! The Depot is in the foreground and the Parks Canada staff house in the distance.

Dr. Amelia Fay

Dr. Amelia Fay

Curator of Anthropology & the HBC Museum Collection

Amelia Fay is Curator of Anthropology and the HBC Museum Collection at the Manitoba Museum. She received her BA in Anthropology from the University of Manitoba (2004), an MA in Archaeology…
Meet Dr. Amelia Fay

Perseid Meteor Shower in progress!

Every August, our planet passes through a giant dust bunny in space. The dust comes from Comet Swift-Tuttle, a “dirty snowball” that orbits the sun in an oval path. The comet itself is not terribly impressive, but it leaves so much dust in our Earth’s path that the Earth spends several days sweeping up millions of dust particles like a planetary broom. Each piece of dust hits the earth’s atmosphere at incredible speeds, and friction with the air causes the dust to vaporize in a flash of light at altitudes of dozens of kilometers. All the way down here on the ground, we can see each speck of dust’s death throes as a “falling star” or “shooting star”. Astronomers prefer the correct term: “meteor”.

There are actually meteors hitting Earth all the time. On any clear night, if you watch the sky carefully you’ll see a few. Under perfect dark conditions, you can expect 5-10 meteors per hour on just about any night, caused by the random dust particles floating around the solar system. In August, though, Earth hits that dust bunny, and we see many more meteors – a meteor shower. Despite the name, the sky doesn’t fill with shooting stars; you may see one every minute or two, though.

The Perseids are just one of a dozen or more annual meteor showers which are visible. Named for the constellation of Perseus, where they appear to radiate from, the Perseids are the best-known meteor shower because they occur in August, when sitting outside all night in a field is survivable. If you want to get technical, the Geminids of December are a better event, but Manitobans certainly recognize the challenges involved in observing them without losing fingers and toes to frostbite.

Observing the Perseids: Meteor showers are the ultimate low-tech observing event. You don’t need a telescope or even binoculars; your main piece of gear is a reclining lawn chair or blanket. You want to get away from city lights if you can – street lights will make it harder to see the fainter meteors, and really cut down on the number you see. Face the darkest part of the sky, and just look up and watch the stars. Every so often, you will see a meteor streak by.

The shower is active now, but it’s a slow build-up. The peak is on the early morning of August 13th, but you should see meteors for several days before and after that. Meteor showers like the Perseids are always best after midnight – you might not see many in the evening hours. This year, the moon is New on the 14th, and so won’t drown out the meteors with its light.

Scott Young

Scott Young

Planetarium Astronomer

Scott is the Planetarium Astronomer at the Manitoba Museum, developing astronomy and science programs. He has been an informal science educator for thirty years, working in the planetarium and science centre field both at The Manitoba Museum and also at the Alice G. Wallace Planetarium in Fitchburg, Massachusetts. Scott is an active amateur astronomer and a past-President of the Royal Astronomical Society of Canada.

Fescue Findings

As I near the end of my two years of pollinator research in the fescue prairie, I’ve been wondering what it all means. In particular I’ve been thinking about how the pollinator communities in fescue prairies are different than in the tall grass prairies. Here are the patterns that seem to be emerging:

1. Bees are more important pollinators in fescue prairie than flies.

When most people think of pollinators they usually think of bees and butterflies. One of the things I discovered is that flies seem to be more common pollinators than bees in the tall-grass prairie and the reverse true in the fescue prairie. Why is this so? I suspect that it is because tall-grass prairies are in general moister. Many bee species nest underground and if the soil is saturated with water they may not be able to breed successfully. Flies on the other hand breed in a wider variety of habitats (many even have parasitic larvae) and are less affected by moist soils. In fact, fly species that breed in water would benefit from moist conditions.

A bumblebee at a cone-shaped cluster of white flowers.

A bumble bee (Bombus) on a field locoweed plant (Oxytropis campestris).

A yellow flower with a small, slender yellow and black Syrphid fly near the centre.

Image: Syrphid flies prefer regular flowers like this sunflower (Helianthus).

2. The dominant pollinators may affect plant community composition.

Close up on the top of a breadroot plant where there is a cluster of small white to blue, pea-shaped flowers.

Irregular flowers were more abundant on the fescue prairie, comprising about a third of all insect-pollinated plant species. Further, a greater percentage of visits (~27%) were to the irregular flowers on the fescue prairie. In tall grass prairie, irregularly flowered plants comprise only about a quarter of all species and receive less than 3% of all insect visits. Irregular flowers, particularly those with long floral tubes, are attractive to long-tongued bees and butterflies. Regular flowers with short or no floral tubes are preferred by small bees and flies, which typically (although not always) have shorter tongues. Thus the pollinator community appears to be influencing the composition of the plant community by preferentially fertilizing irregular flowers.


Image: The irregular flowers of this breadroot (Pediomelum esculentum) plant are attractive to bees.

3. Insect activity was lower in the spring on fescue prairies than on tall grass prairie.

Close up on a pink flower of a Prickly wild rose.

Bees were more abundant pollinators in the fescue prairie than flies. However in the spring their populations are still small as only the queen bees are out foraging. Bee populations reach their peak in late summer when worker bees are busy collecting nectar and pollen. In contrast, pollinator visits were much higher in the tall grass prairie in spring due to large populations of overwintering flies that hatched once it warmed up.


Image: This prickly rose (Rosa acicularis) is visited by flies and small bees.

4. Grazing can alter pollinator activity.

When comparing the pollinator visitation rate between grazed and ungrazed plots over the whole year there was no difference except with respect to timing. The grazed fescue prairie plots had more flowers in spring and early summer and subsequently more insect visitation at those times. In contrast, ungrazed plots produced more flowers in late summer and fall, and experienced more visitations at this time of the year. This suggests that the ideal land management might be a combination of grazing and rest so that a maximum diversity of flowers are available to the pollinator community over the year.

Dr. Diana Bizecki Robson

Dr. Diana Bizecki Robson

Curator of Botany

Dr. Bizecki Robson obtained a Master’s Degree in Plant Ecology at the University of Saskatchewan studying rare plants of the mixed grass prairies. After working as an environmental consultant and sessional lecturer…
Meet Dr. Bizecki Robson