


Posted on: Tuesday August 17, 2021
By Debbie Thompson, past Diorama and Collections Specialist
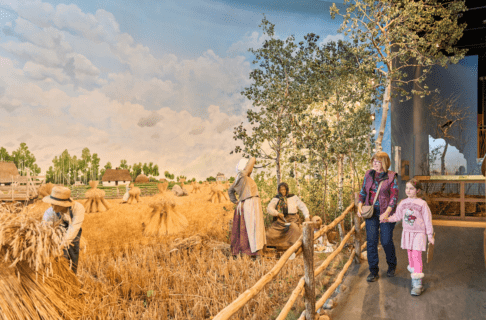
More than 440 million years ago, during the Ordovician Period, northern Manitoba was at the edge of a sea near the equator. Among the many invertebrates that swam and lived in the salty waters were jellyfish. Their fossilized remains are the focus of ongoing research at the Museum.
After years of collecting, specific specimens were chosen to undergo a process called thin sectioning. This process creates ultra-thin slices of rock and fossil, supported by epoxy and glass slides. They are thin enough to allow light to pass through, revealing details about internal structures, which can then be studied using a microscope.
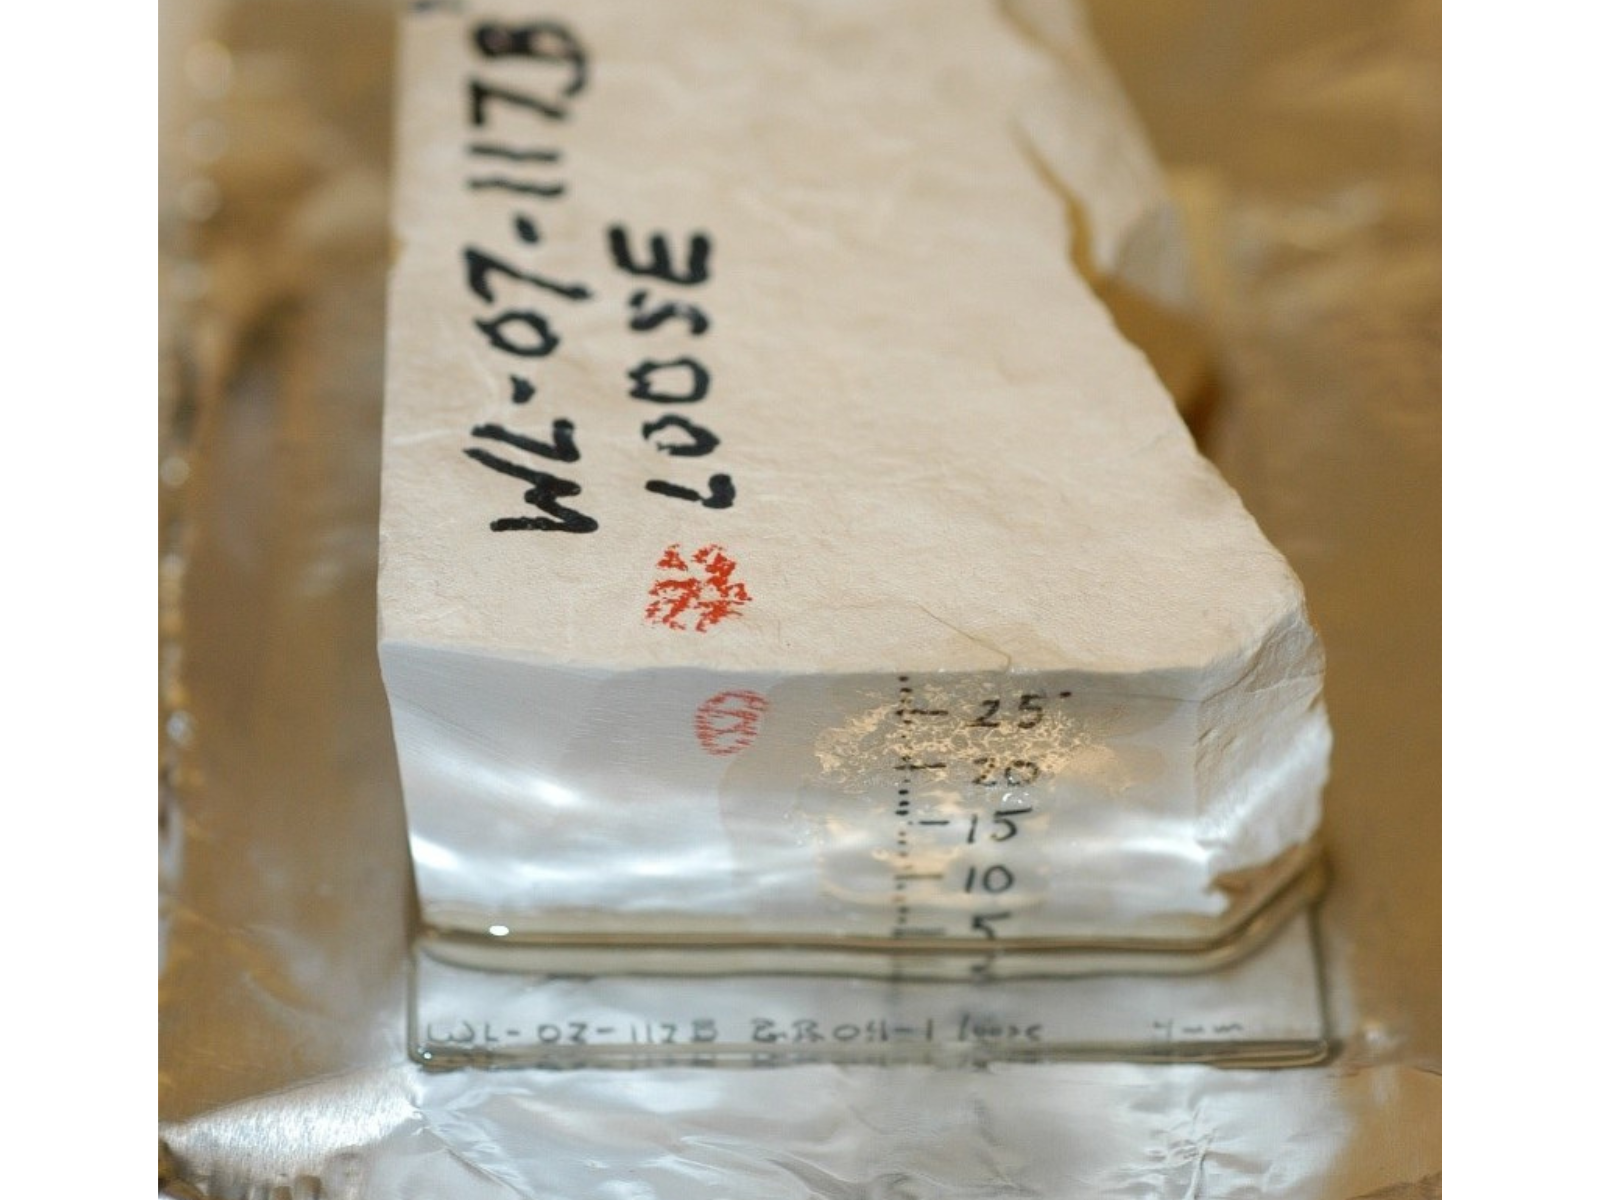
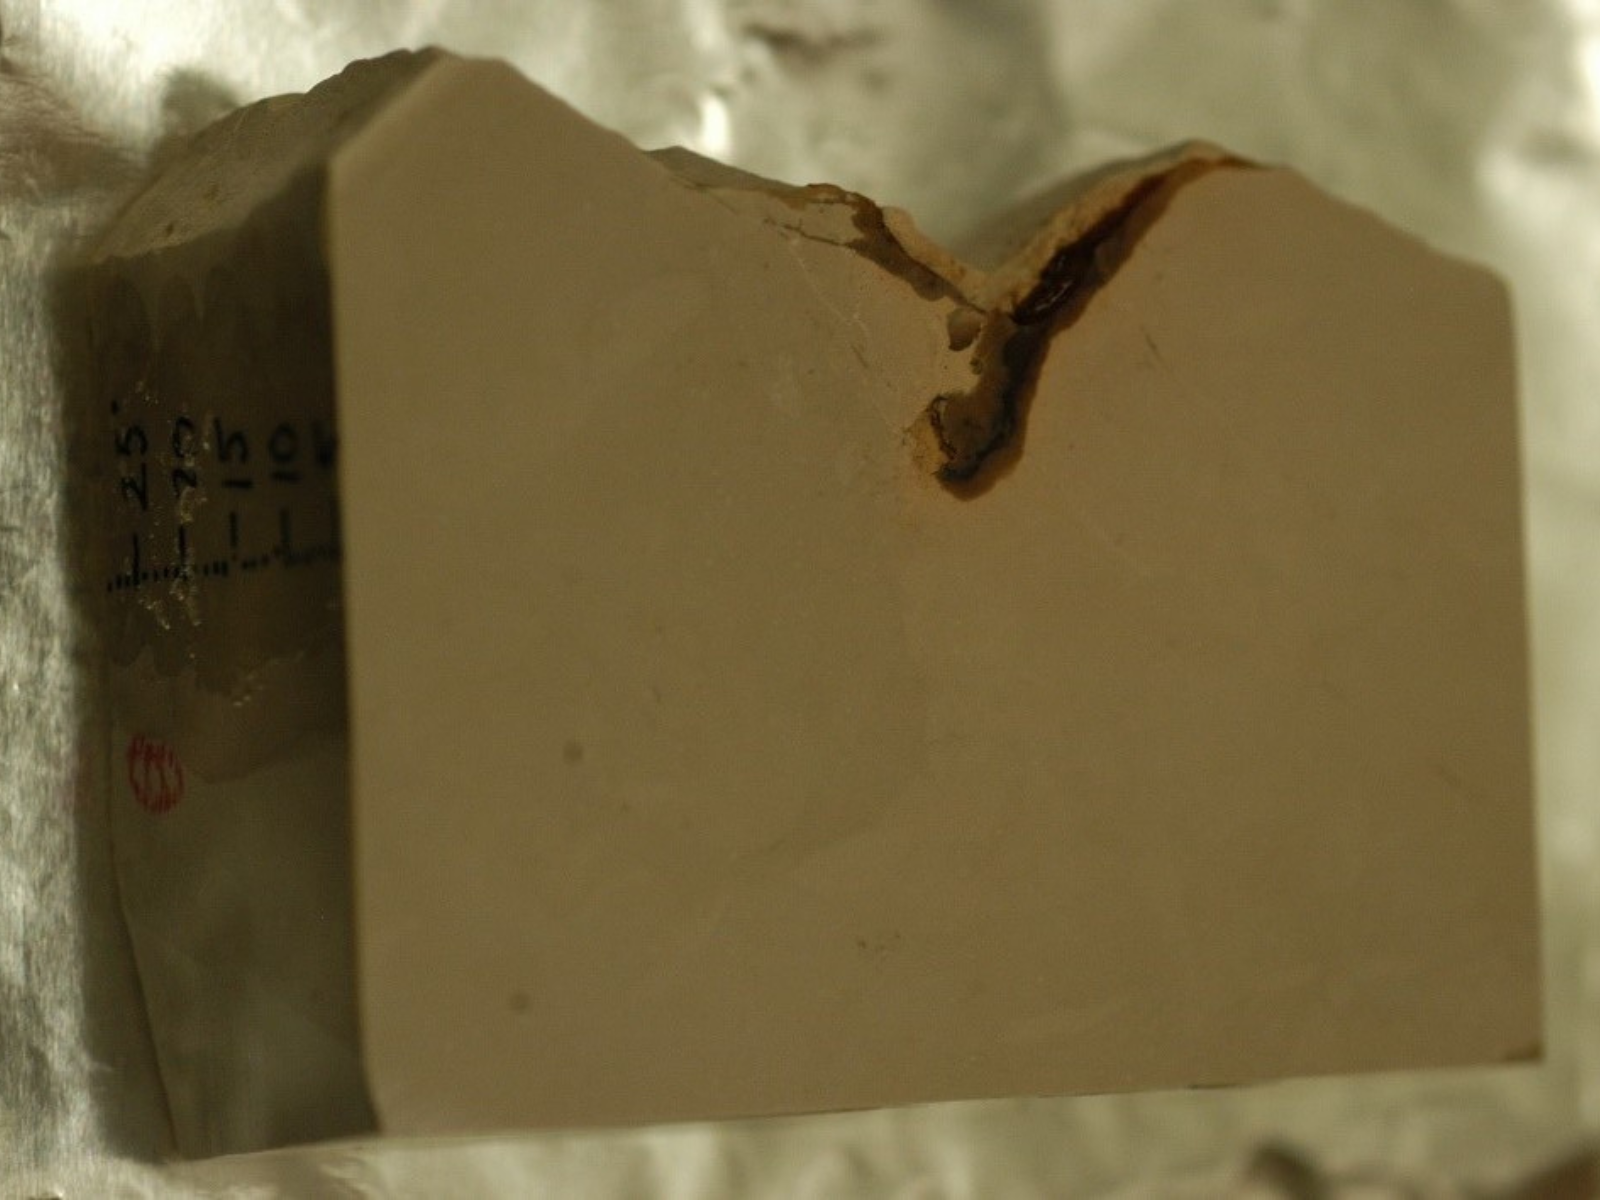
The fossils selected for this process can range in size from one to four centimeters in diameter. Every block is trimmed using a rock saw, so that the block will fit onto a glass slide. The fossil surface then needs to be polished smooth and to an accurate scale in millimeters written on two sides of the block.
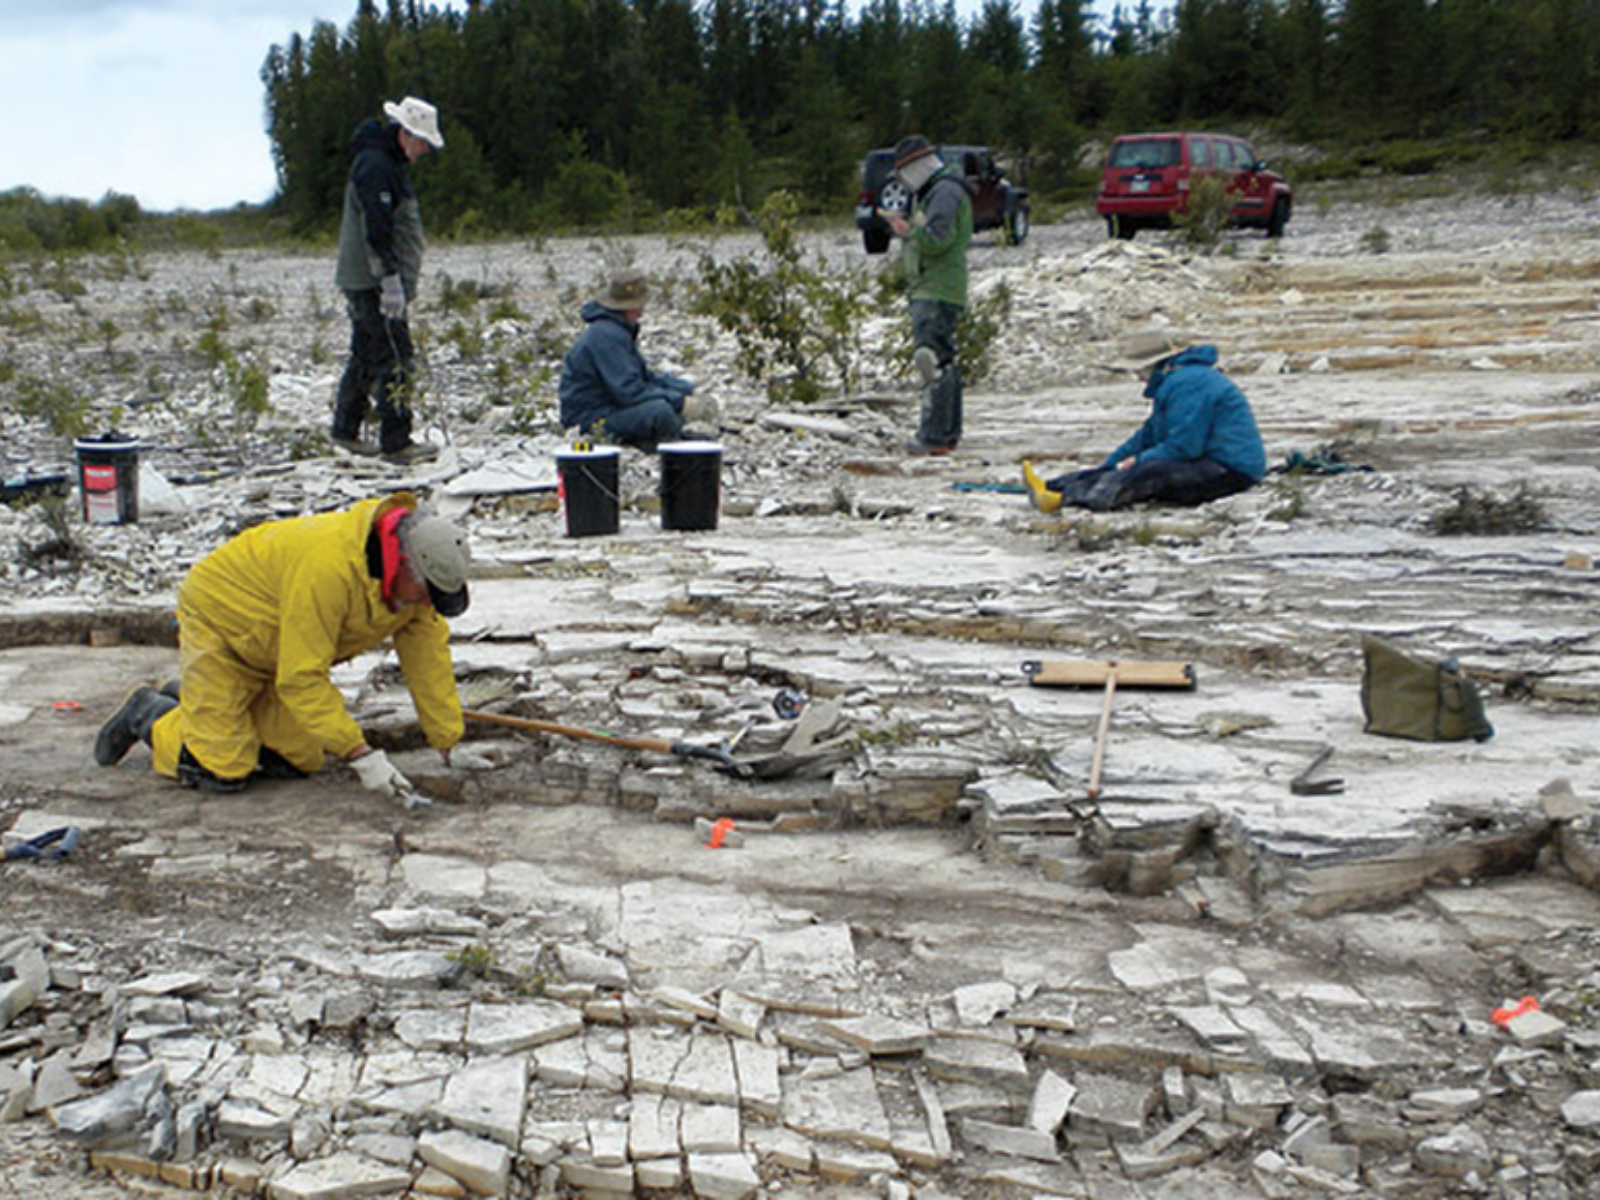
Palaeontologists and volunteers search for fossil jellyfish during Museum fieldwork. Image: © Manitoba Museum
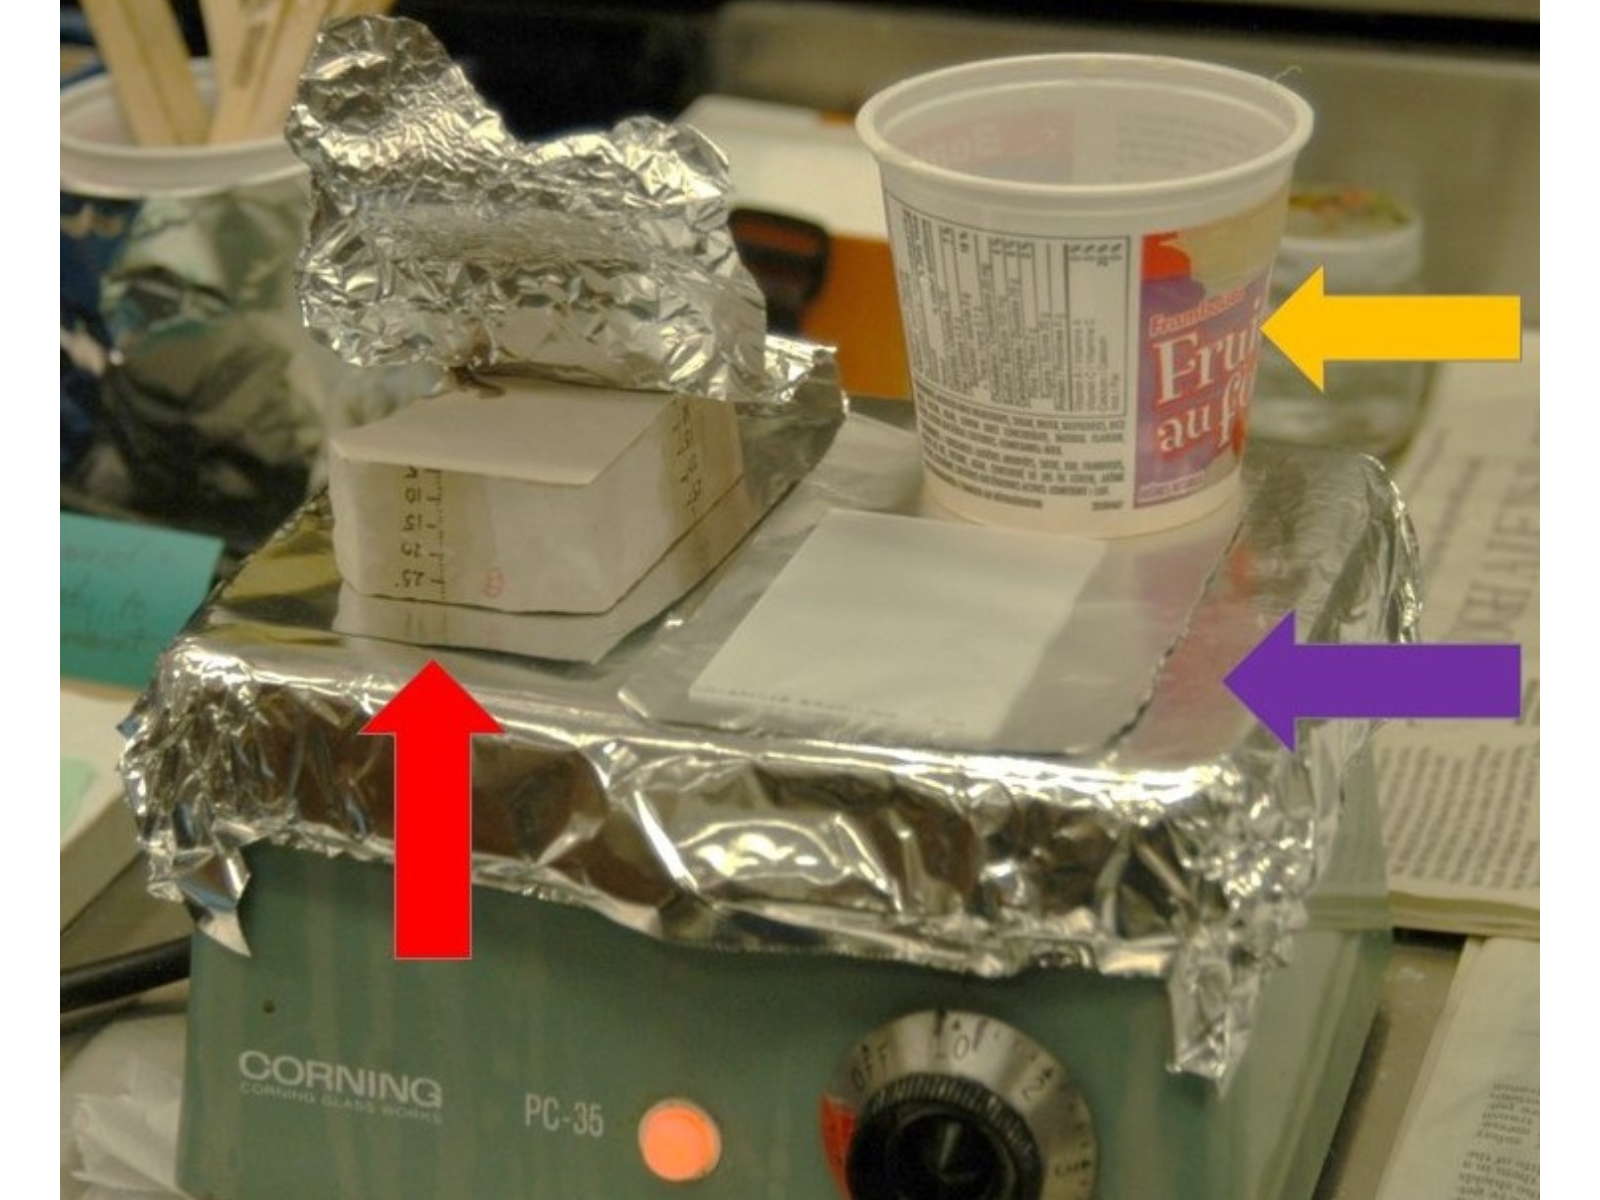
The red arrow points to the fossil block, note the scale (numbers written on sides of block). The foil is peeled back to reveal the polished fossil surface. The purple arrow points to the glass slide, which has been polished so that epoxy glue will stick to it. The yellow arrow points to a container that is warming one part of a two-part epoxy. The hot plate heats up these components to aid in the even flow and setting of the epoxy. Image: © Manitoba Museum
Each slide is labeled with the data regarding that particular specimen. If too much epoxy is applied, it will flow over the edges and seep underneath the slide. Here the polished fossil surface has been epoxied to the glass slide. Image: © Manitoba Museum
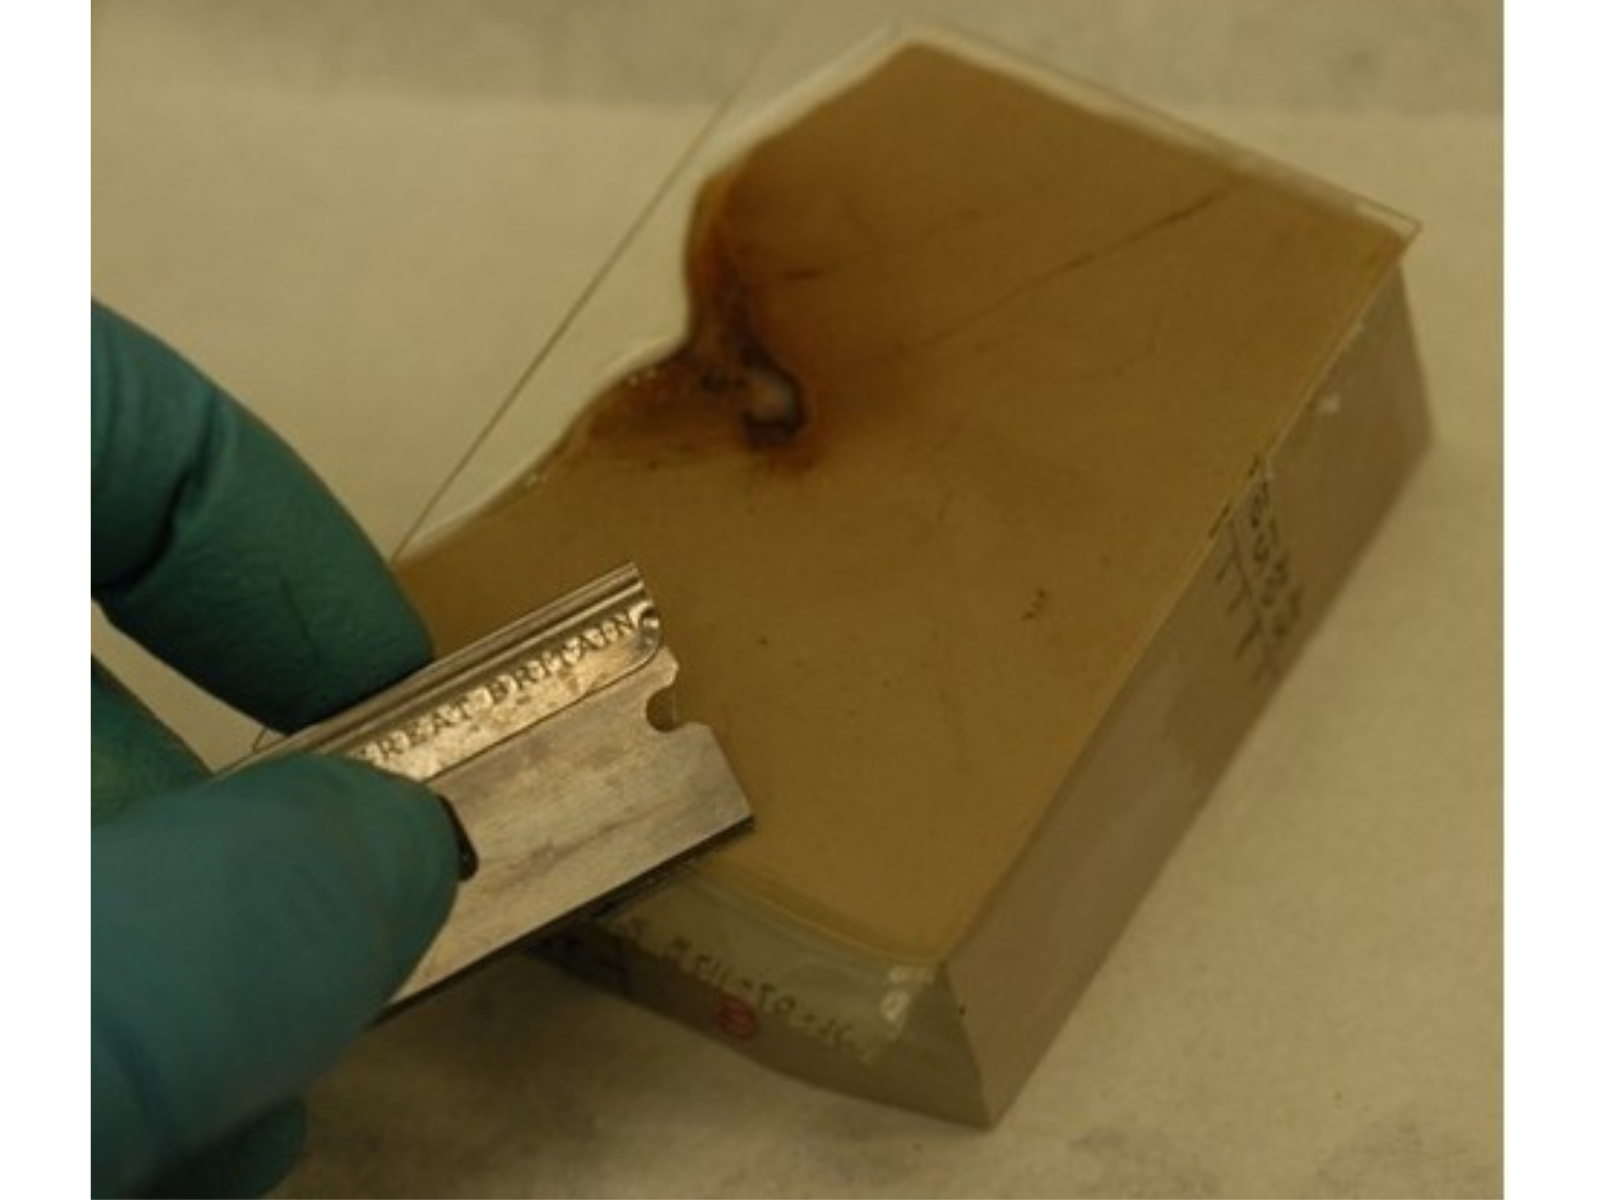
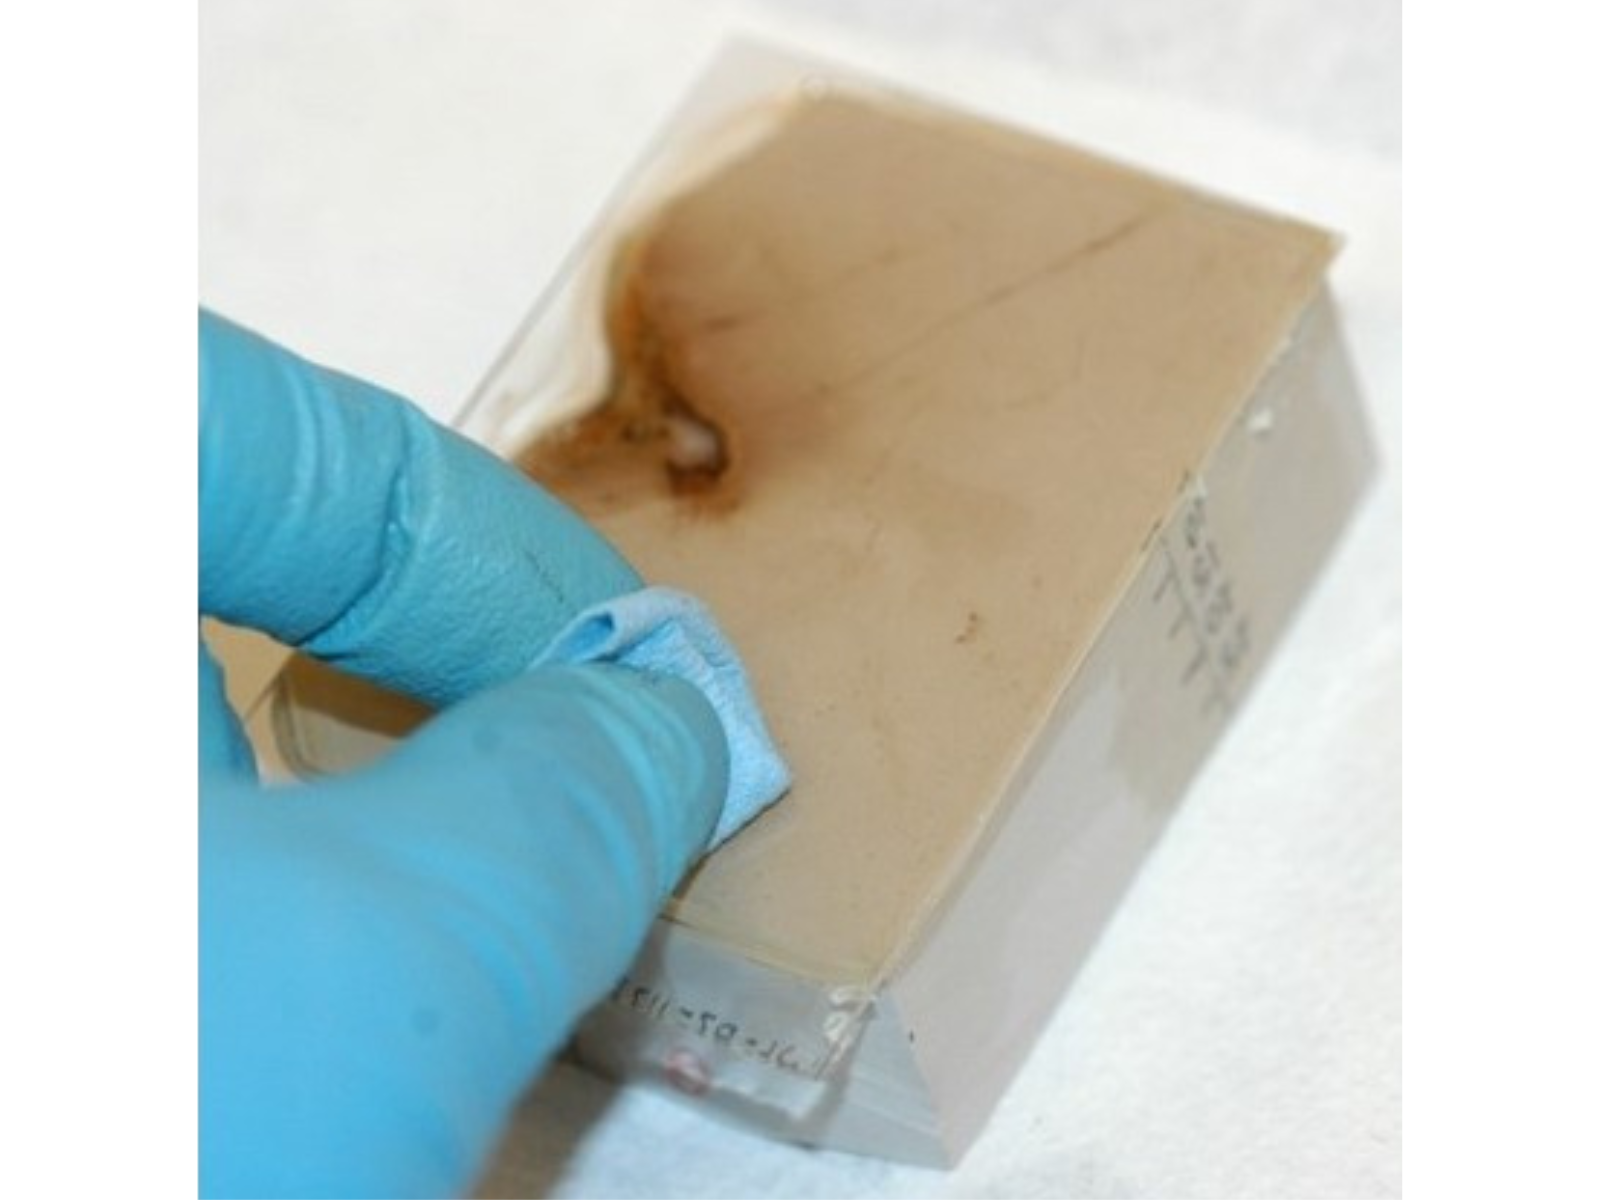
After the adhesive sets, but before it cures hard, any epoxy that seeped underneath is carefully scraped off using a razor blade, and solvent removes remaining residue. Image: © Manitoba Museum
Normally, a whole day will be spent just gluing the specimens onto the slides. To help pass the time, it helps to listen to country music while doing this (although the Curator would strongly disagree with my choice of music). Image: © Manitoba Museum
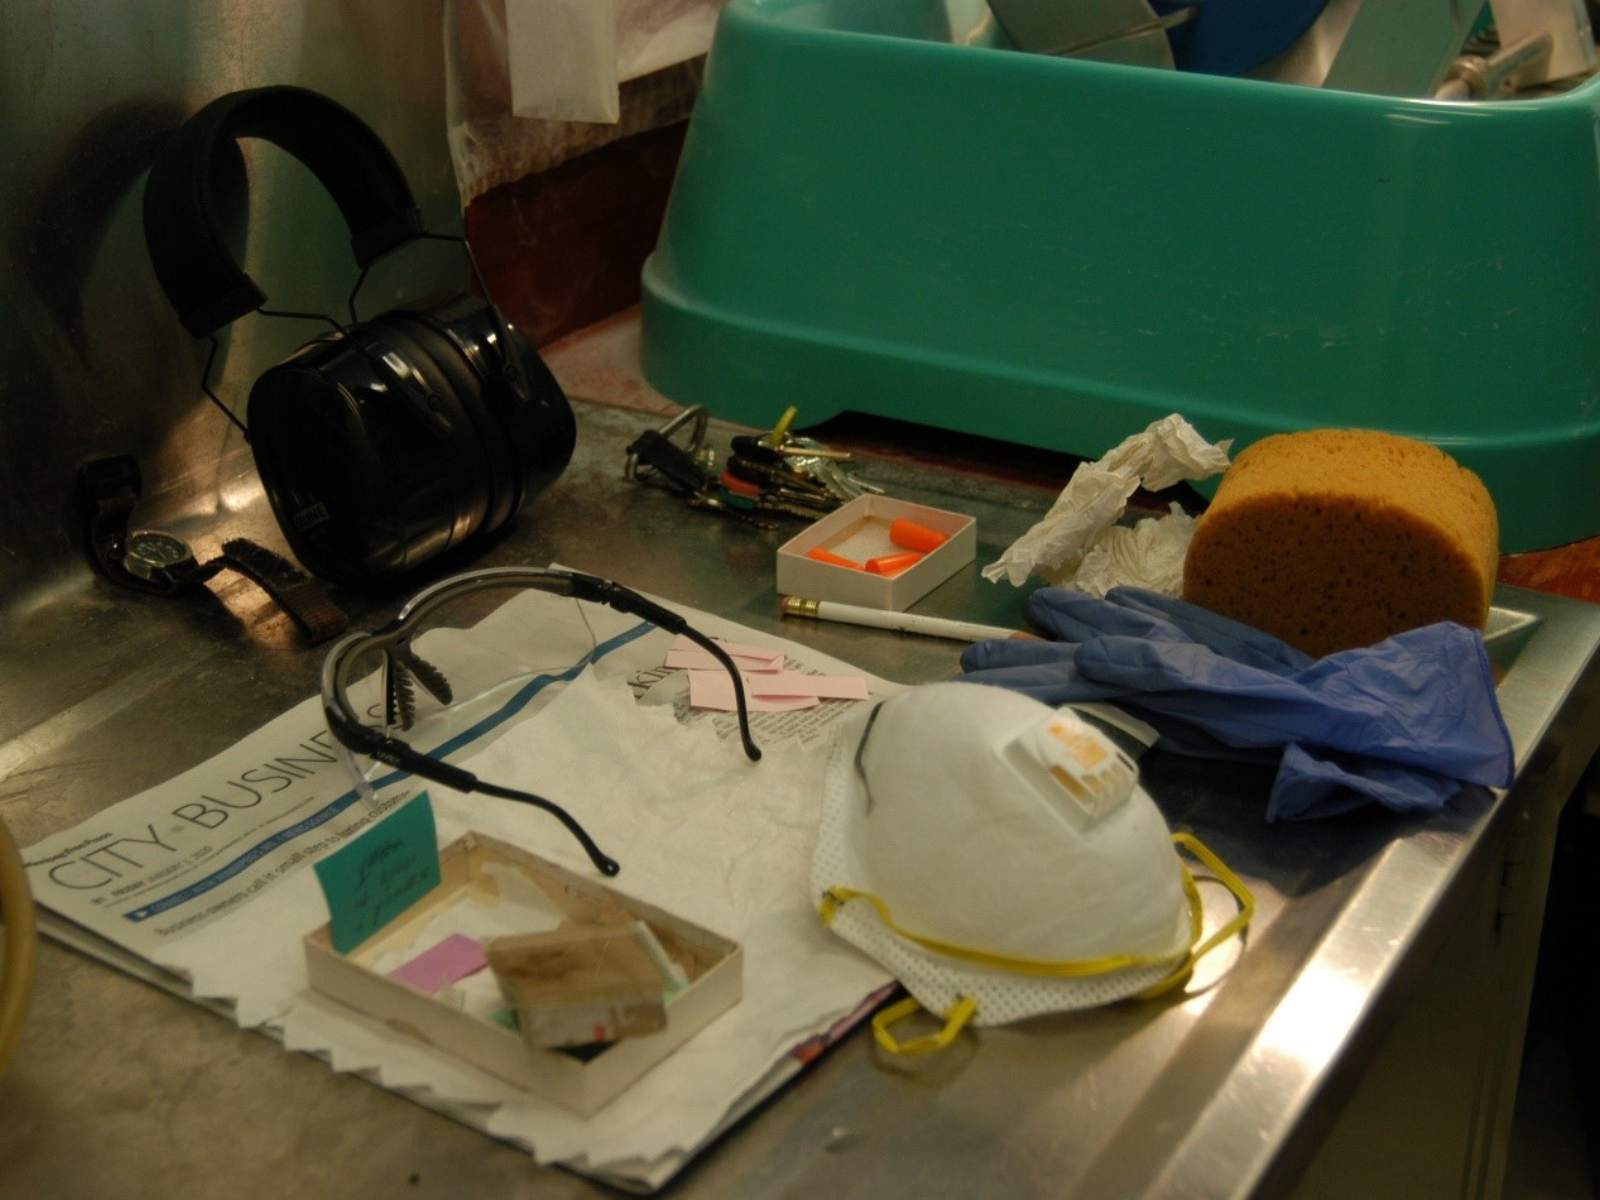
Before starting the rock-cutting saw, the radio is turned off, much to the Curator’s delight! The thin section machine is noisy, creating the need for ear plugs and heavy-duty earmuffs. Safety glasses are a must, guarding against stone chips. The gloves protect the hands from being water logged for extended periods of time. A mask is needed to prevent breathing in the water spray laden with sediment, as the water is recycled and gradually becomes dirtier the more it’s used. The sponge is used to clean up the sludge that accumulates in the tray. Image: © Manitoba Museum
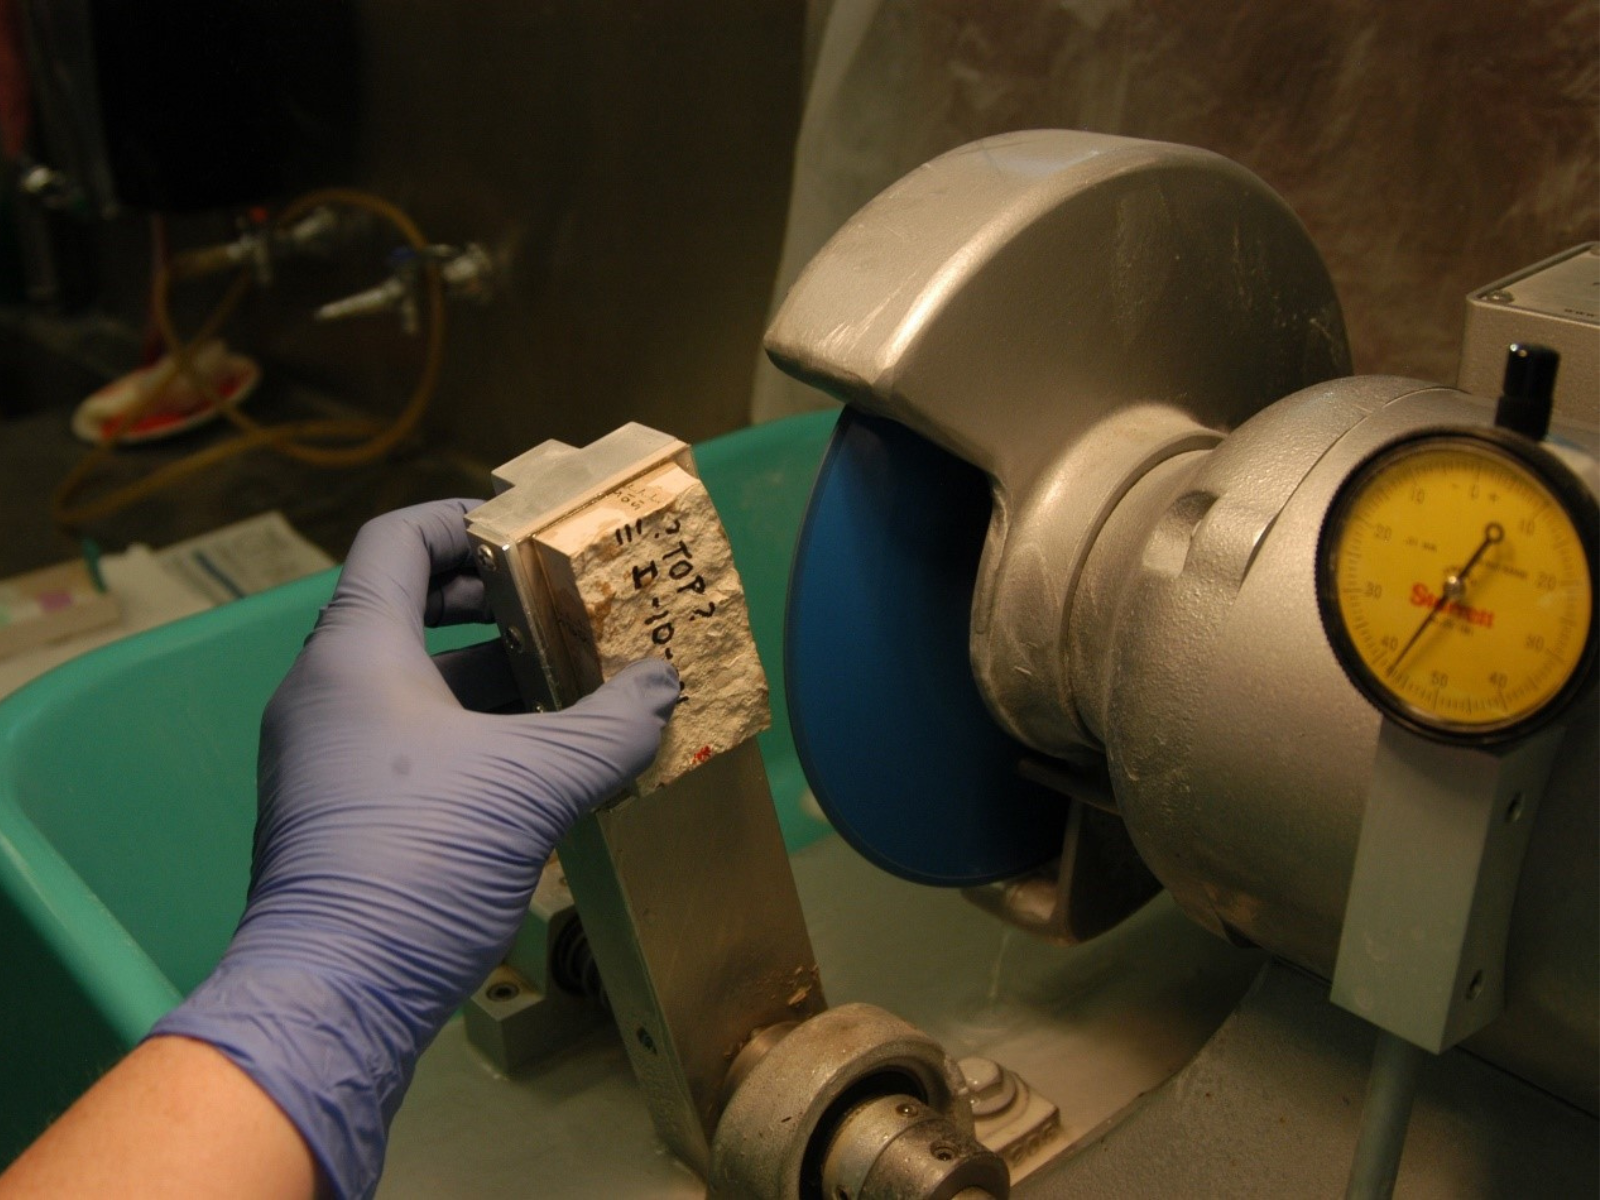
The block is held on the thin section machine’s arm, and gently pushed into the saw. Very thick blocks will require several cuts from each side. Being extremely cautious, this could take me about 5 minutes to cut. Image: © Manitoba Museum
The cut is finished. The glass slide with the thin slice of rock and fossil is still attached to the arm while I hold the remaining block. On both surfaces, the paler, circular fossil jellyfish can be seen. Image: © Manitoba Museum
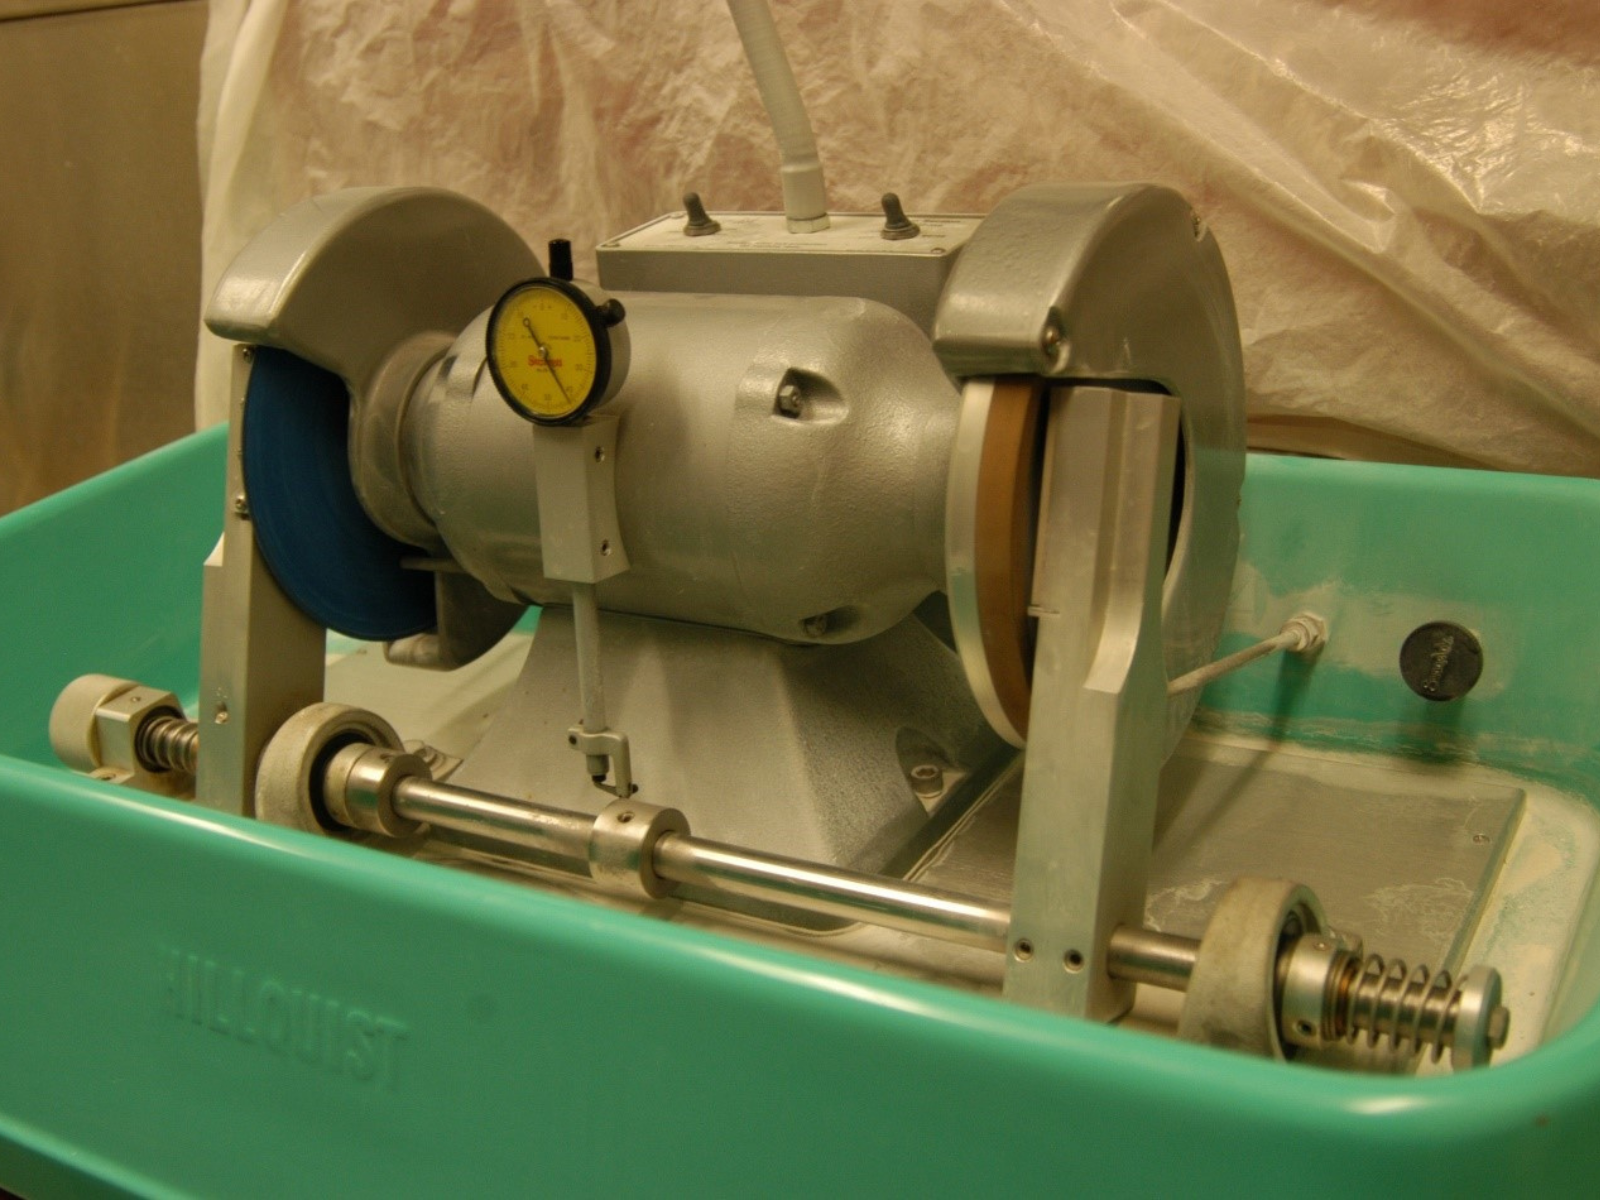
The saw, with the cutting blade on the left and the polishing wheel on the right. The gauge in the middle indicates the thickness of the slide being polished. The slide will now be moved to the right-hand arm of the thin section machine, where it is polished on a diamond wheel. Image: © Manitoba Museum
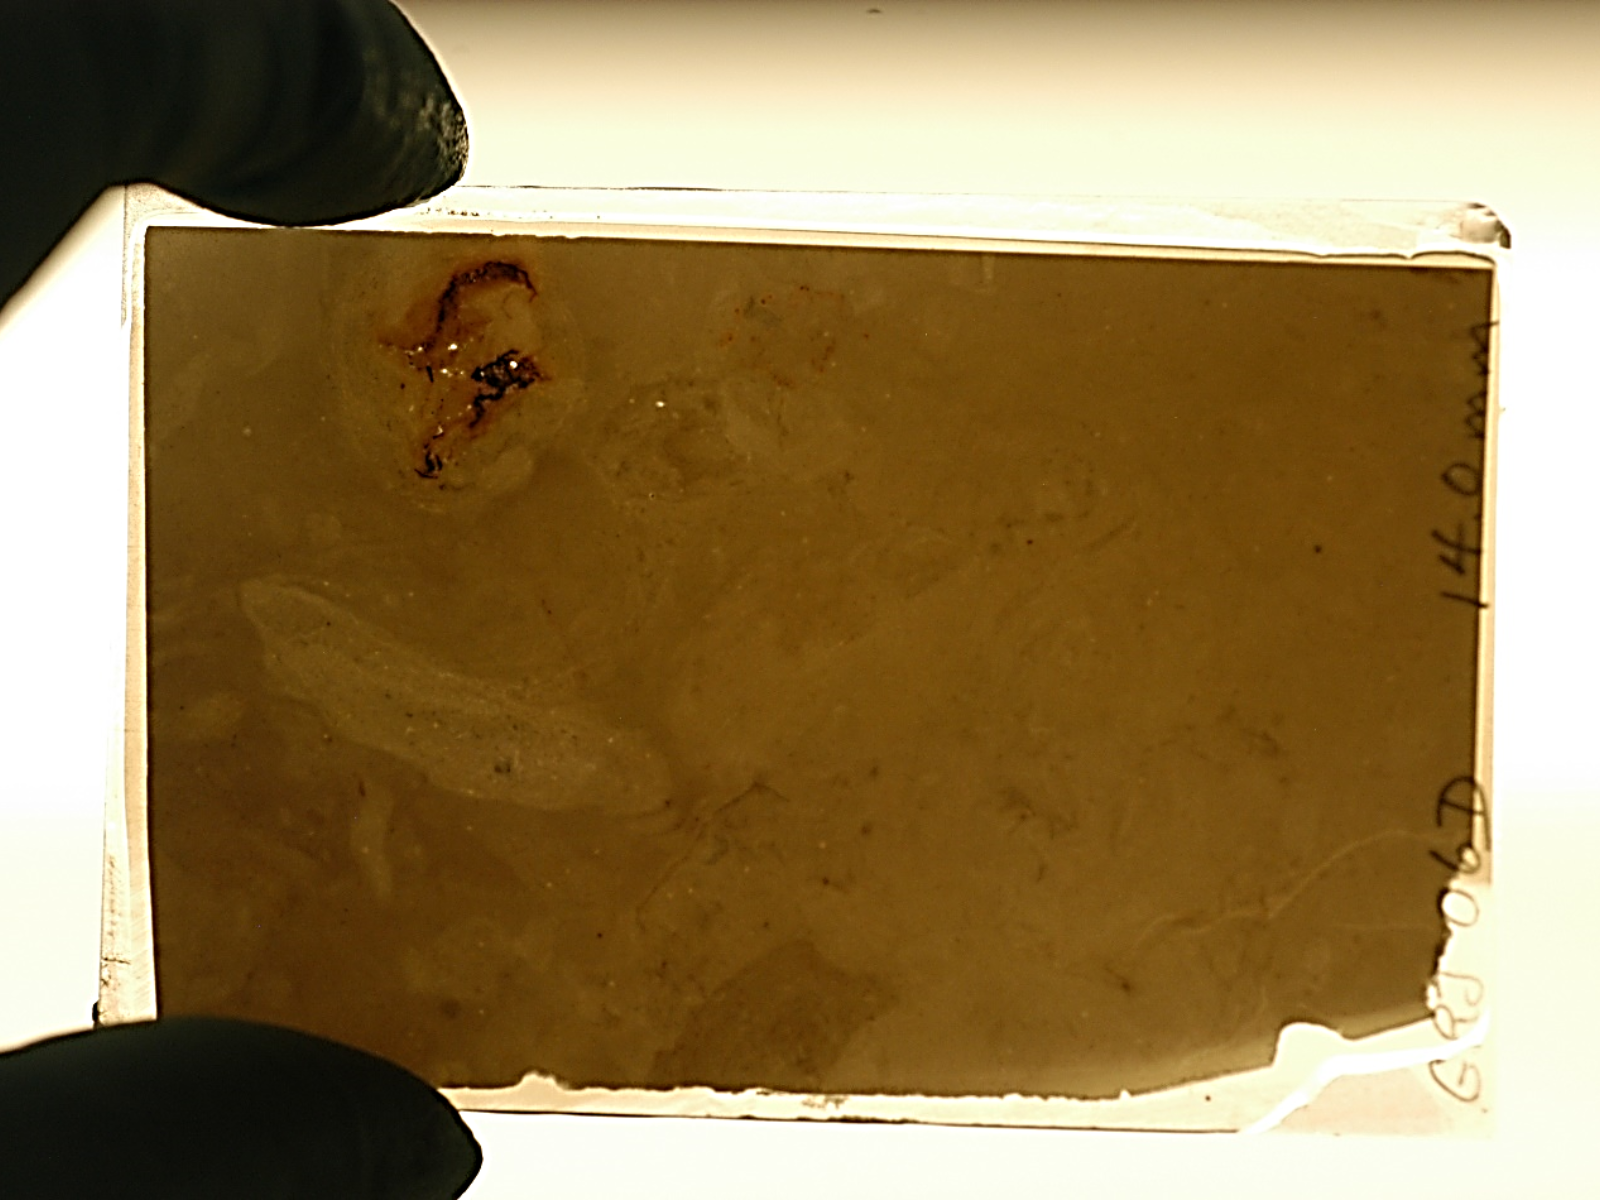
The fossil has been cut and partially polished so thin that light begins to pass through it. It is nearly thin enough for microscopic study. The final hand polishing will be done by the Curator, using a slurry of fine grit on a glass plate. The slide is then placed in a protective envelope. In this example, the fossil is near the top left corner of the slide. Some of the internal features are a dark reddish colour, due to the presence of iron oxide. The faint pale outline is the edge of the jellyfish’s bell. Image: © Manitoba Museum
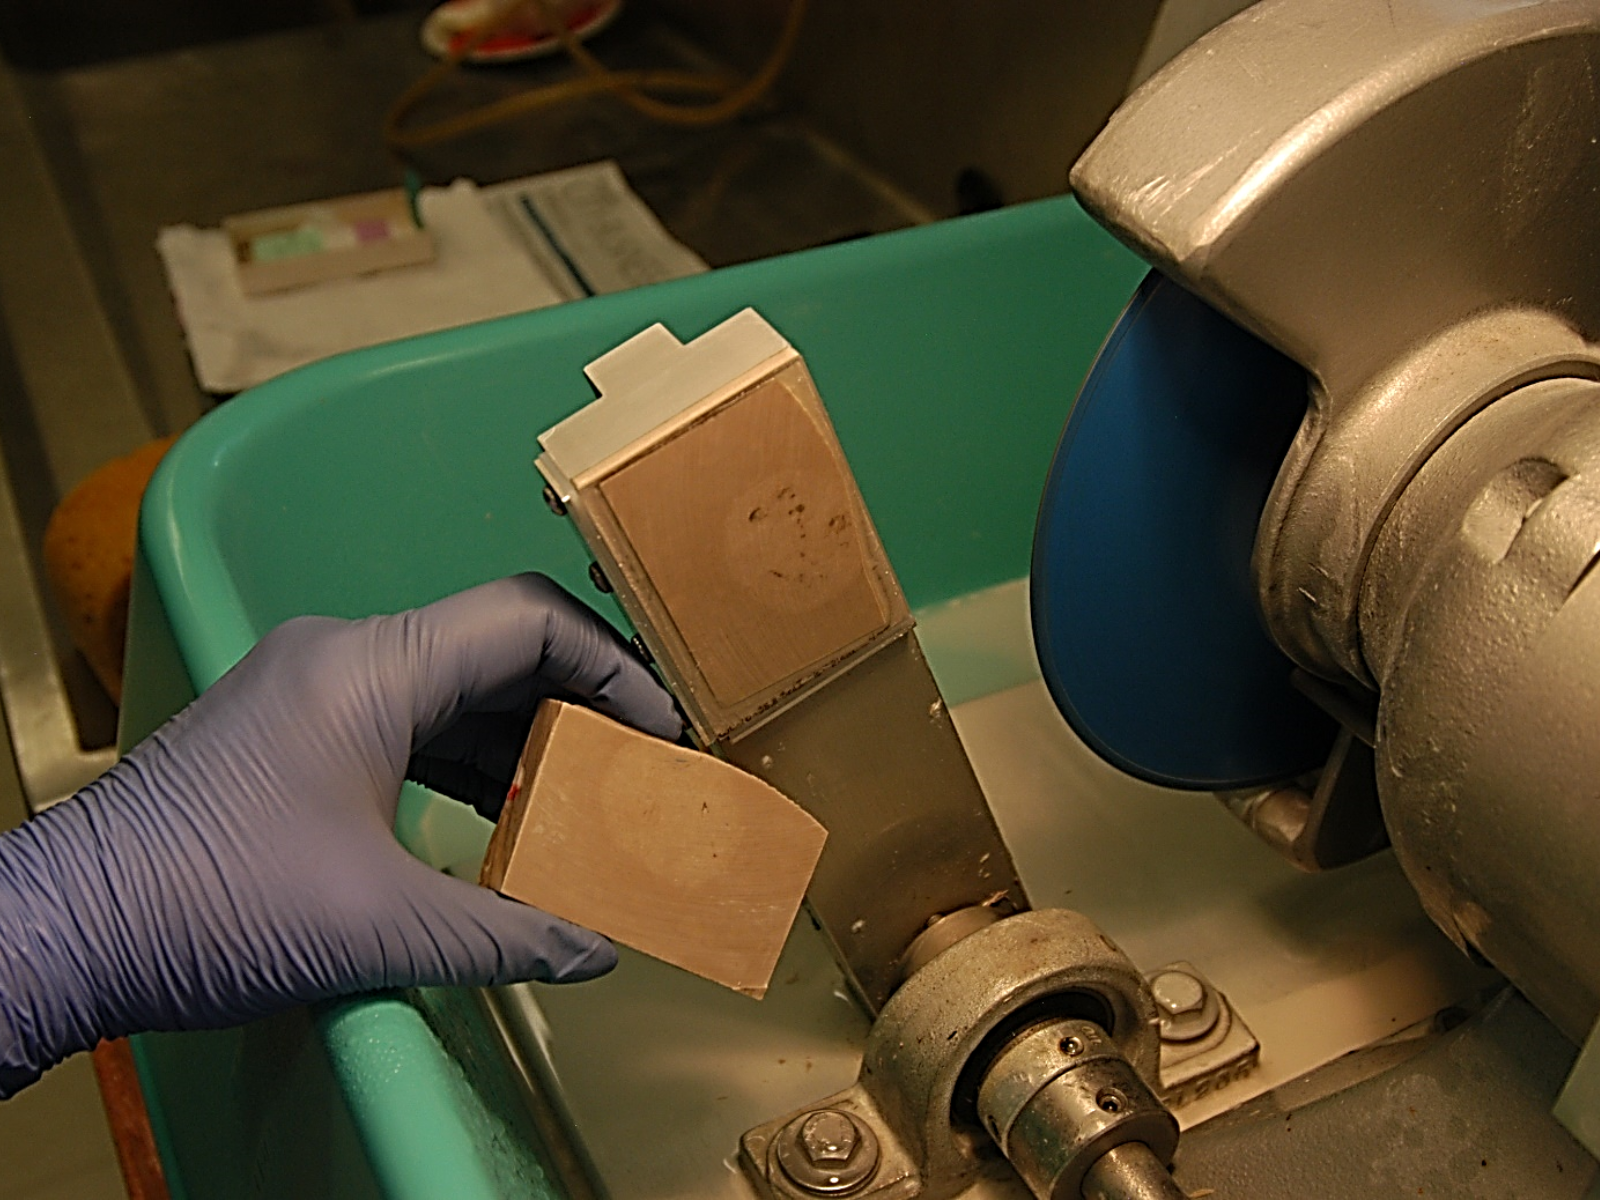
The newly exposed cut surface is re-polished, and the whole process is repeated. Depending on how deep into the rock it goes, each block can yield 4 to 6 thin sections, creating thin slices that are just two millimetres apart. If a new fossil appears, we keep making thin sections. If the fossil disappears, one more slide is made to confirm that we have reached the end of sectioning for that specimen. Image: © Manitoba Museum
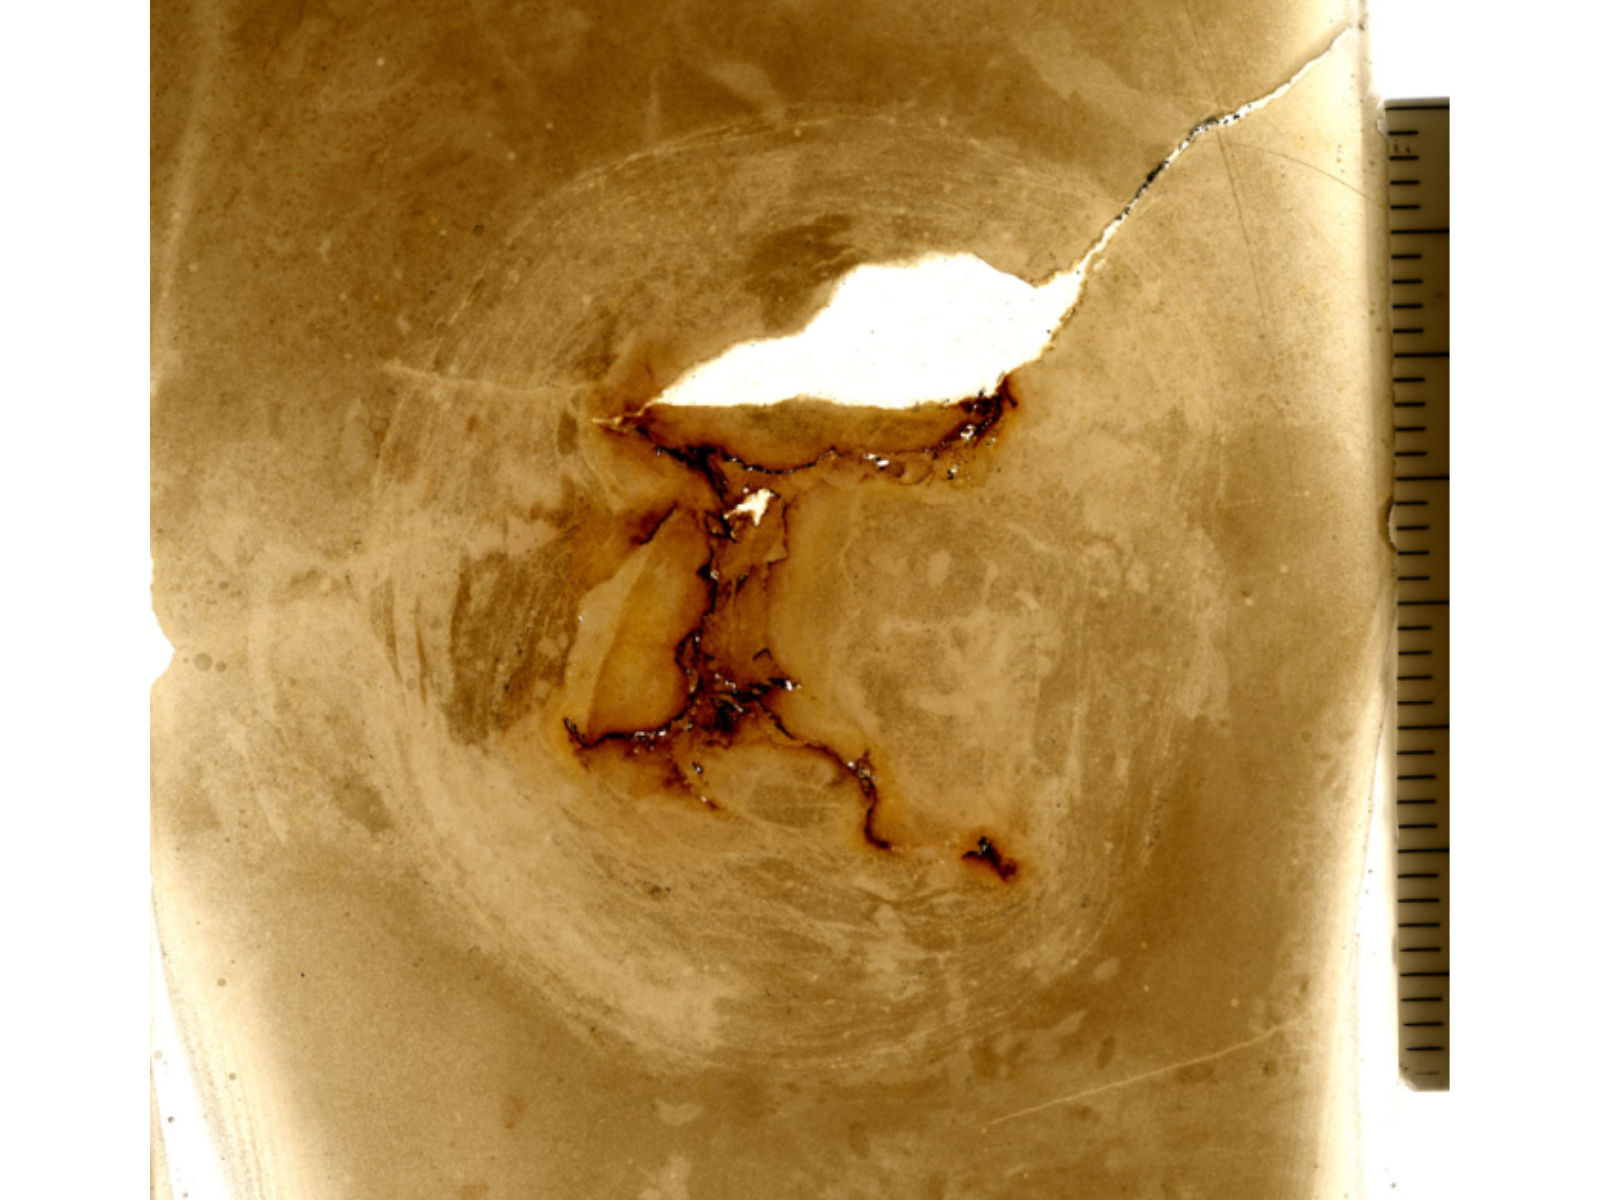
Light passes through a finished thin section, revealing such intricate details as the rust coloured internal canals (due to the presence of iron oxide), and the margin of the bell with faint traces of its tentacles around the outer edges. Ruler is in millimetres. Image: © Manitoba Museum
After sectioning, the slide is scanned on a photographic flatbed scanner. A computer program then digitally assembles the thin section photos for each jellyfish to generate a 3-D image of the body, including internal structures and in some cases, tentacles.